

How to Comment on Mokkup.ai?
Enhance collaboration with comments, which allows you to address feedback, refine designs, and iterate more efficiently—all within your dashboard wireframe project. Just click on the comment icon to add remarks to mockups, where you can @mention team members and incorporate emojis & images into your messages.
Add a Comment
- Post a comment directly on any element on the canvas; it will belong to and move with the element.
- Select an element to leave an element-specific comment, or for general comments, just click on the comment icon.
- When you’re ready to share your thoughts, click the blue Publish button or press the Enter key to post your comment.
- You can even sort the comments based on various criteria such as their type (e.g., replies, mentions), whether they have been read or unread, the screen type, and the time at which they were posted.
Follow a Thread
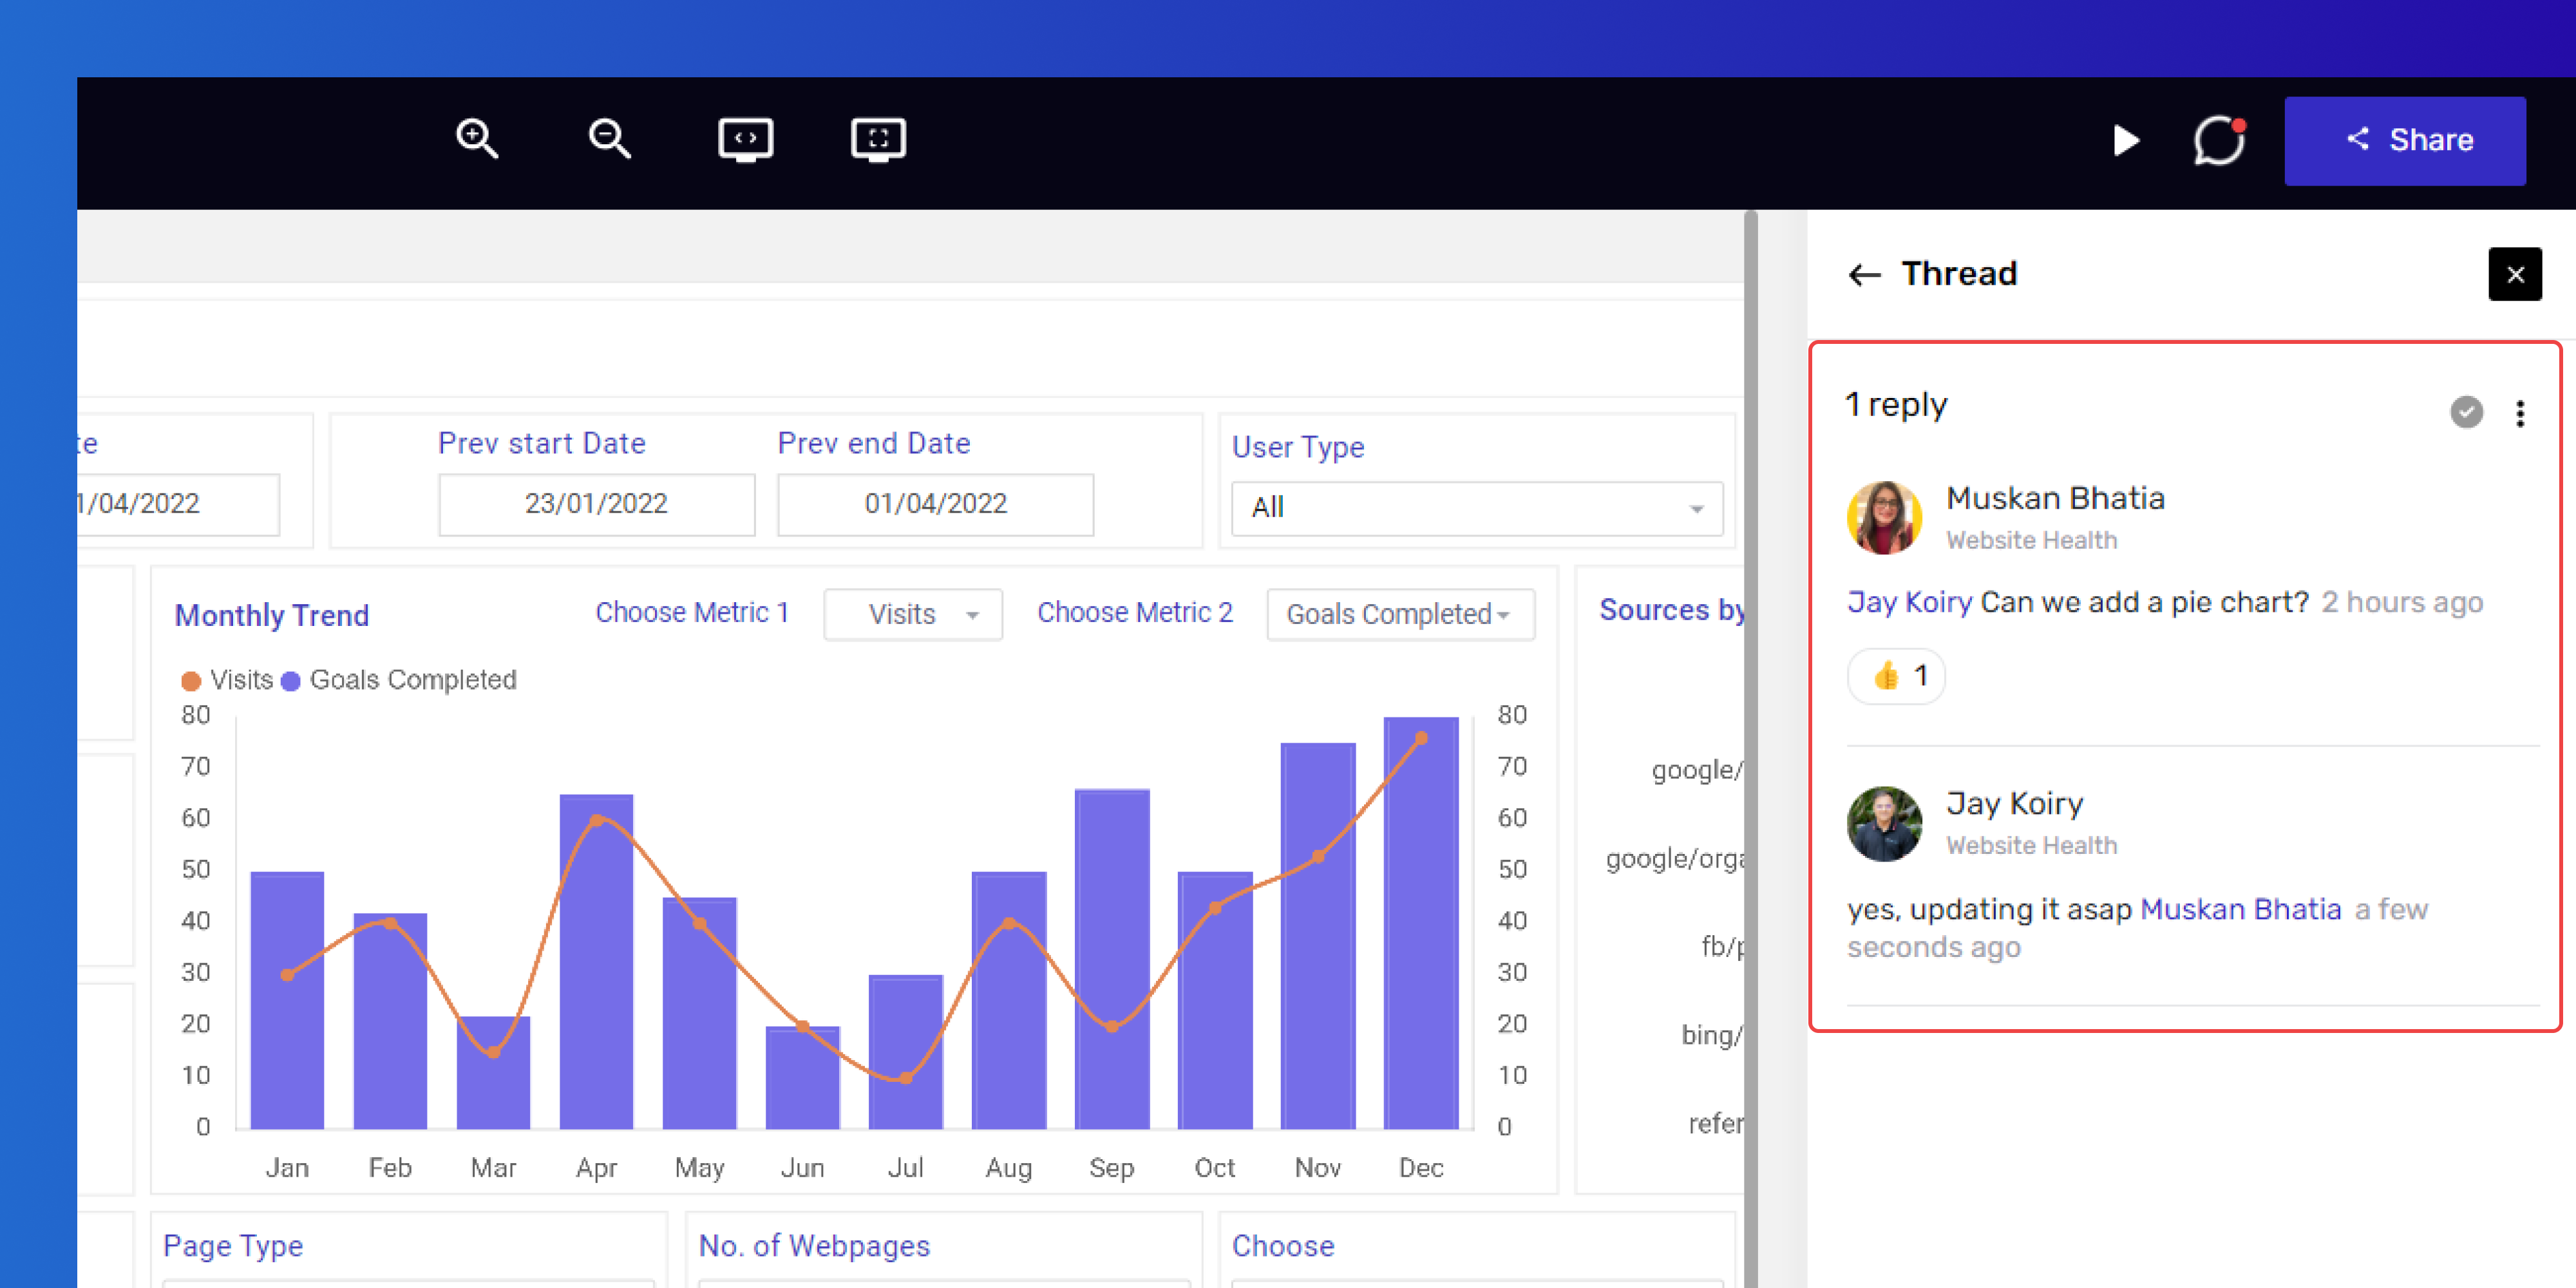
- A comment thread allows for sequential replies, enabling ongoing discussion on a specific topic within the dashboard wireframe.
- You'll receive notifications on the bell icon on the main home page of the app whenever you’re mentioned with @ in any comment or invited to collaborate in a dashboard wireframe.
Search or Filter a Comment
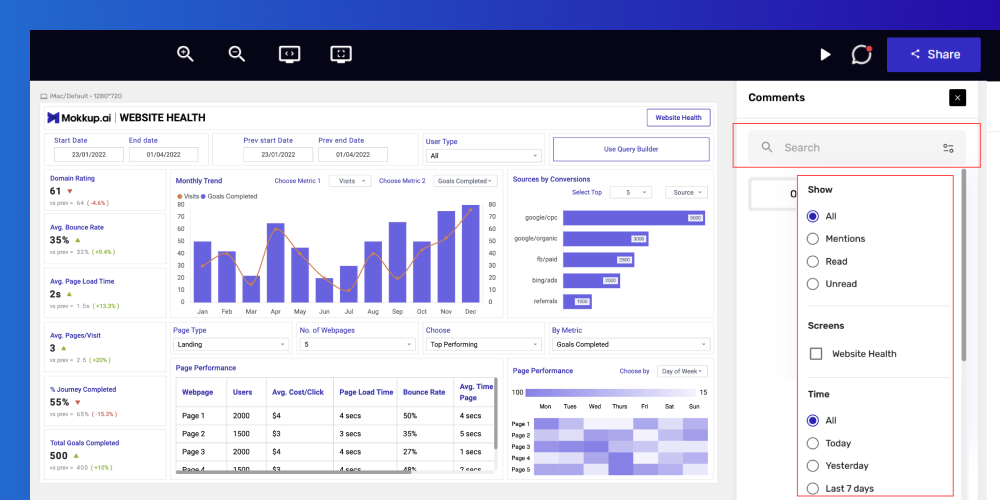
You can search for comments to locate specific feedback. The filter option enhances your productivity by showcasing only relevant information. Follow the below steps:
- To access filter options, click the filter icon on the right of the search bar.
- Here, you can filter messages by status like read, unread, or mentioned.
- Filter messages by screen, selecting either all screens or specific ones.
- Filter messages by time, choosing from a specific period or choosing all the comments since you shared the project for feedback
This helps you focus on the specific communication threads or activities you’re interested in. For instance, you can filter to see only unread messages from a particular screen on a specific day.
Resolving and Reopening Comments
- You have the option to label any comment as "Mark As Resolved" if the issue/feedback has been taken care of
Resolving Comments
- Hover over the comment you want to resolve.
- Click on the ✔️ Check button to resolve the comment.
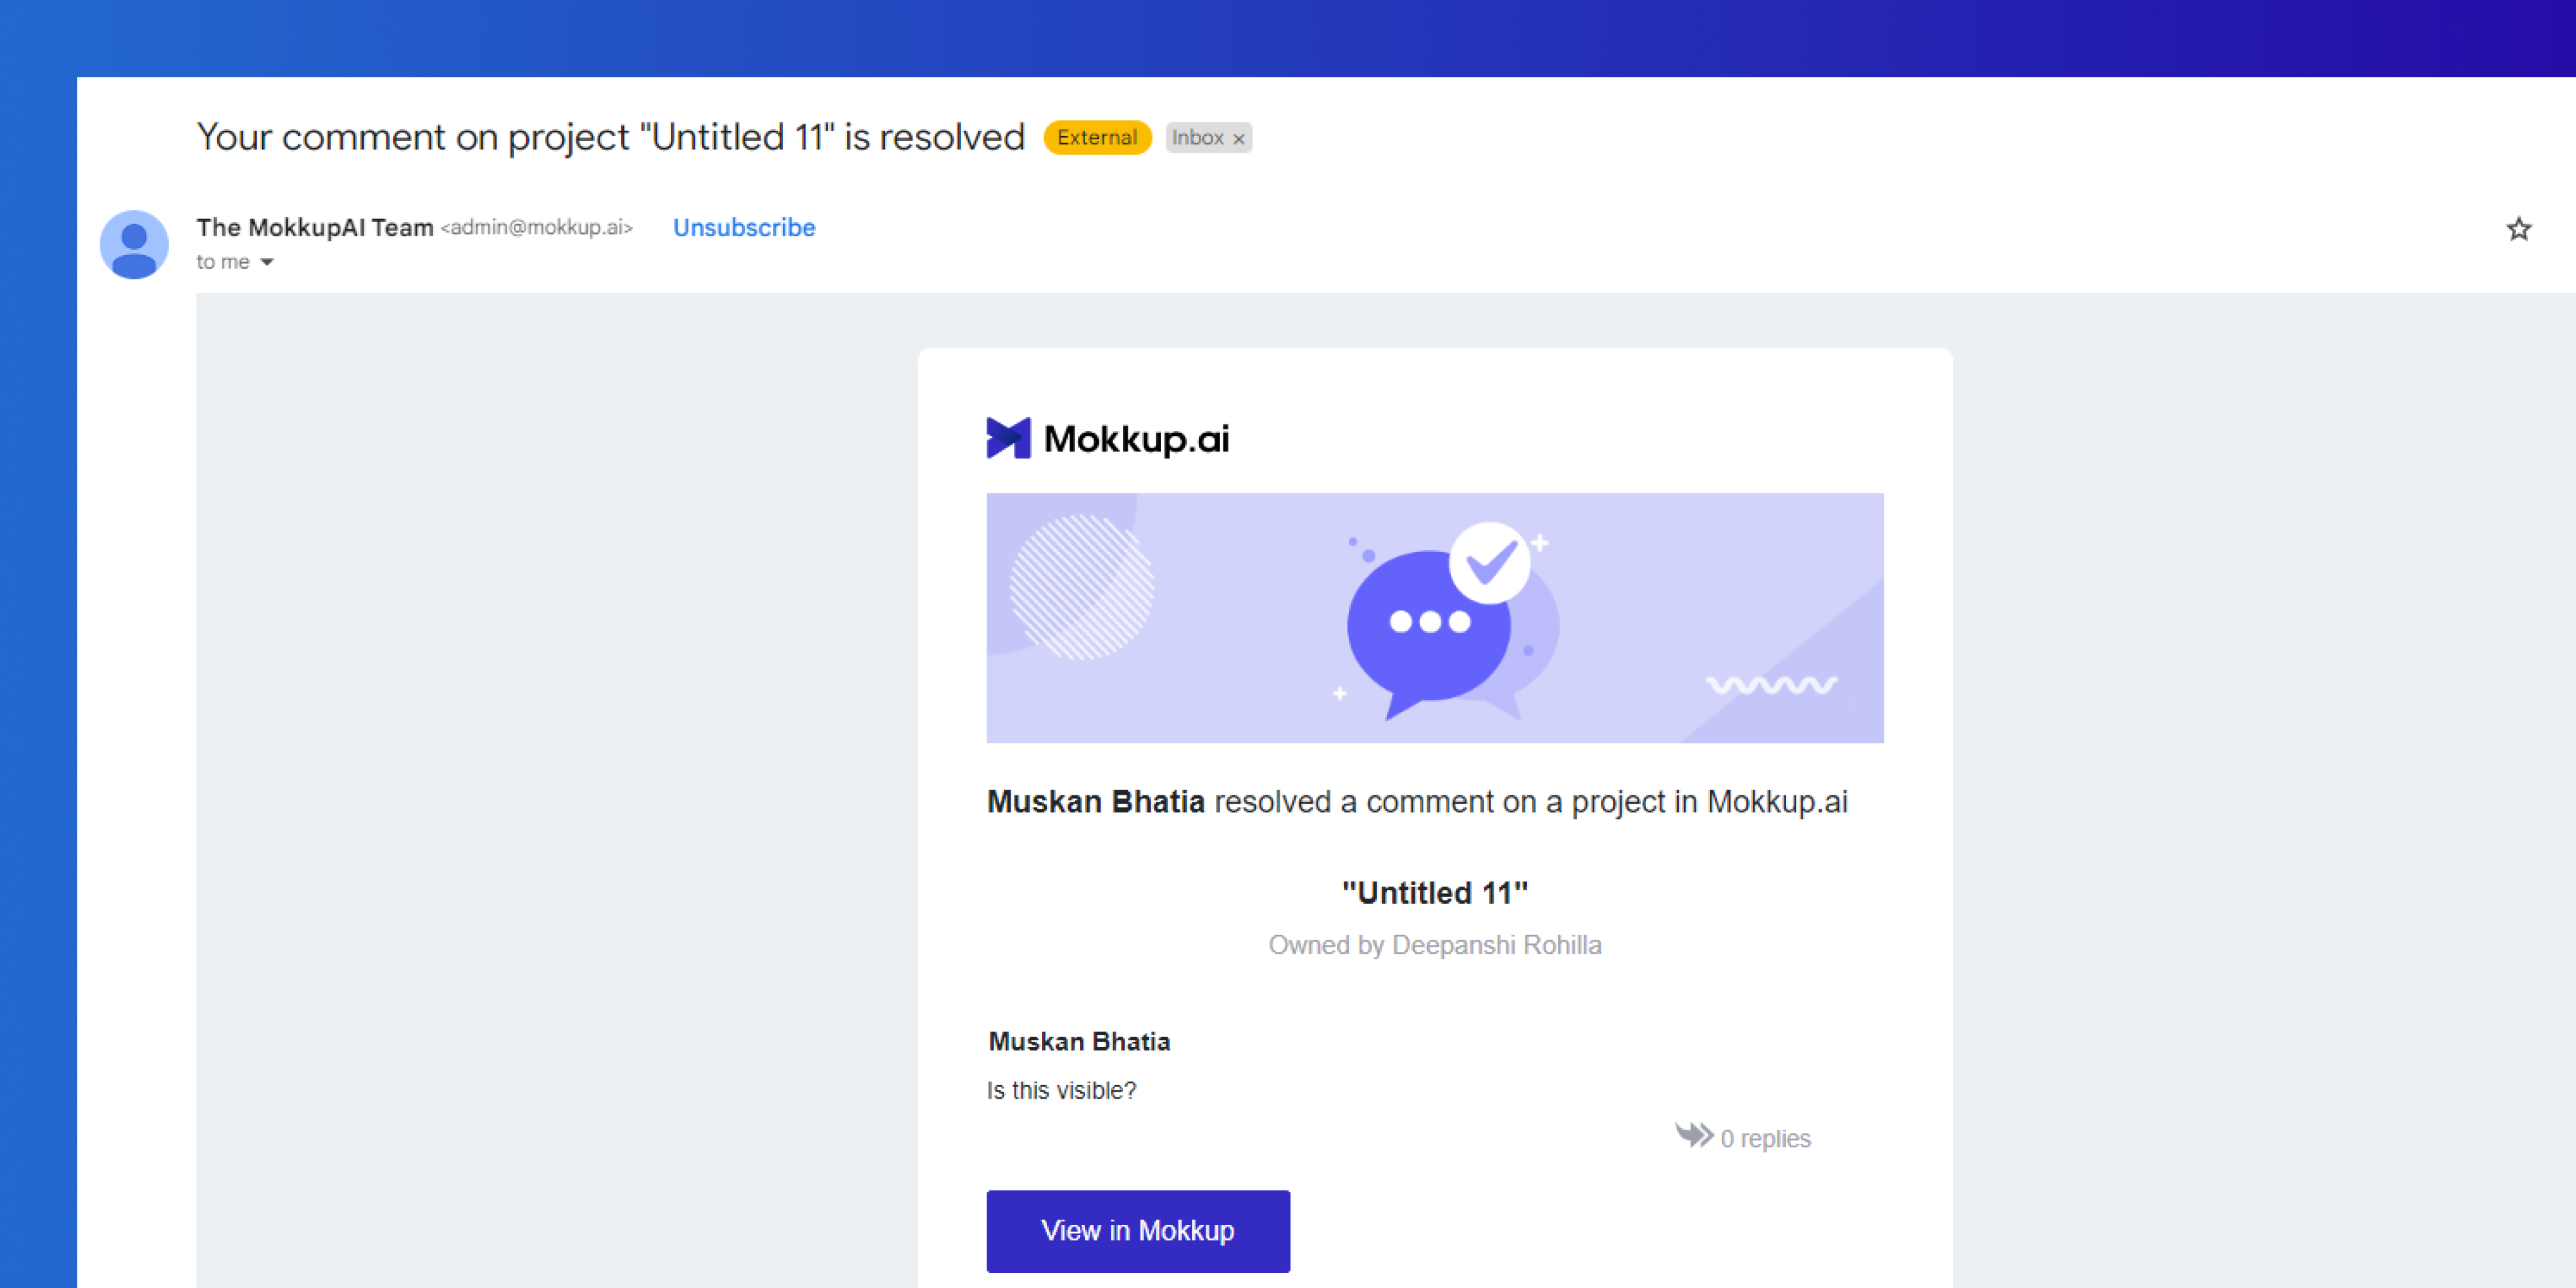
- You’ll receive an email after resolving the comment, as shown below:
- Only if you are mentioned in a comment and have access to comment or manage, can you resolve or reopen the comment.
Reopening Resolved Comments
If you want to reopen a comment thread, follow the steps below:
- Find the comment in the resolved tab.
- Click on the “three dots” on the comment you want to reopen, then select Reopen.
- To view the restored comments, you can find them again in the Open tab and the design.
Edit a comment
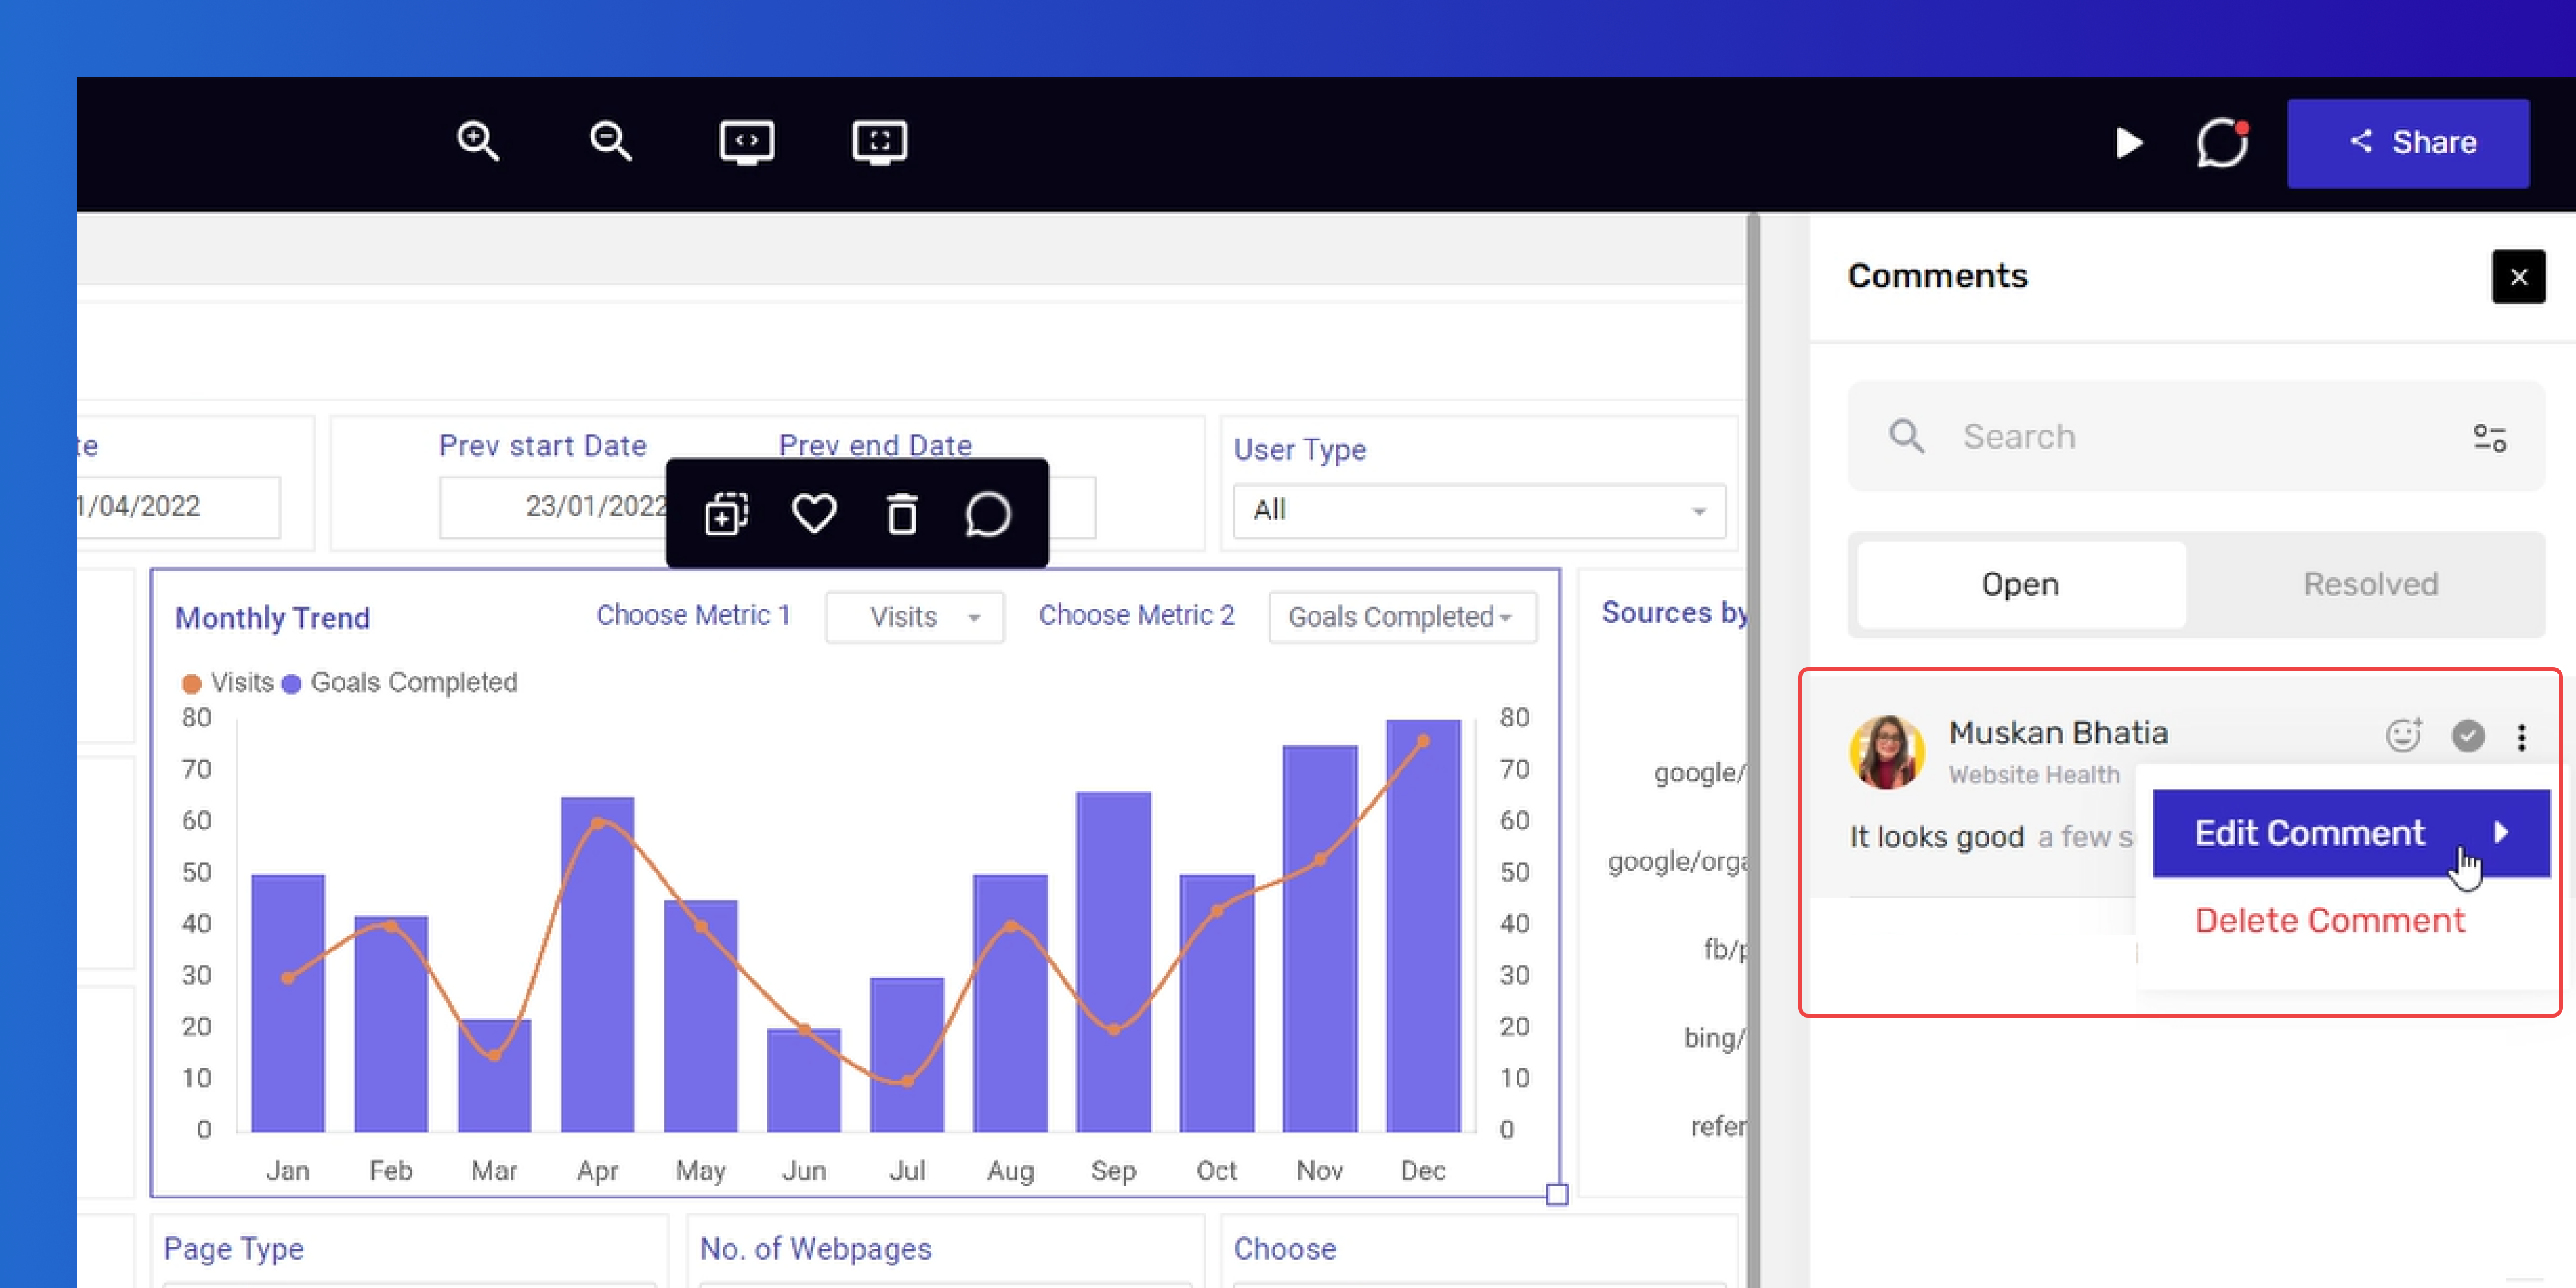
- To edit a comment you've left, click on the 3 dots, make the necessary changes, and save.
Delete a comment
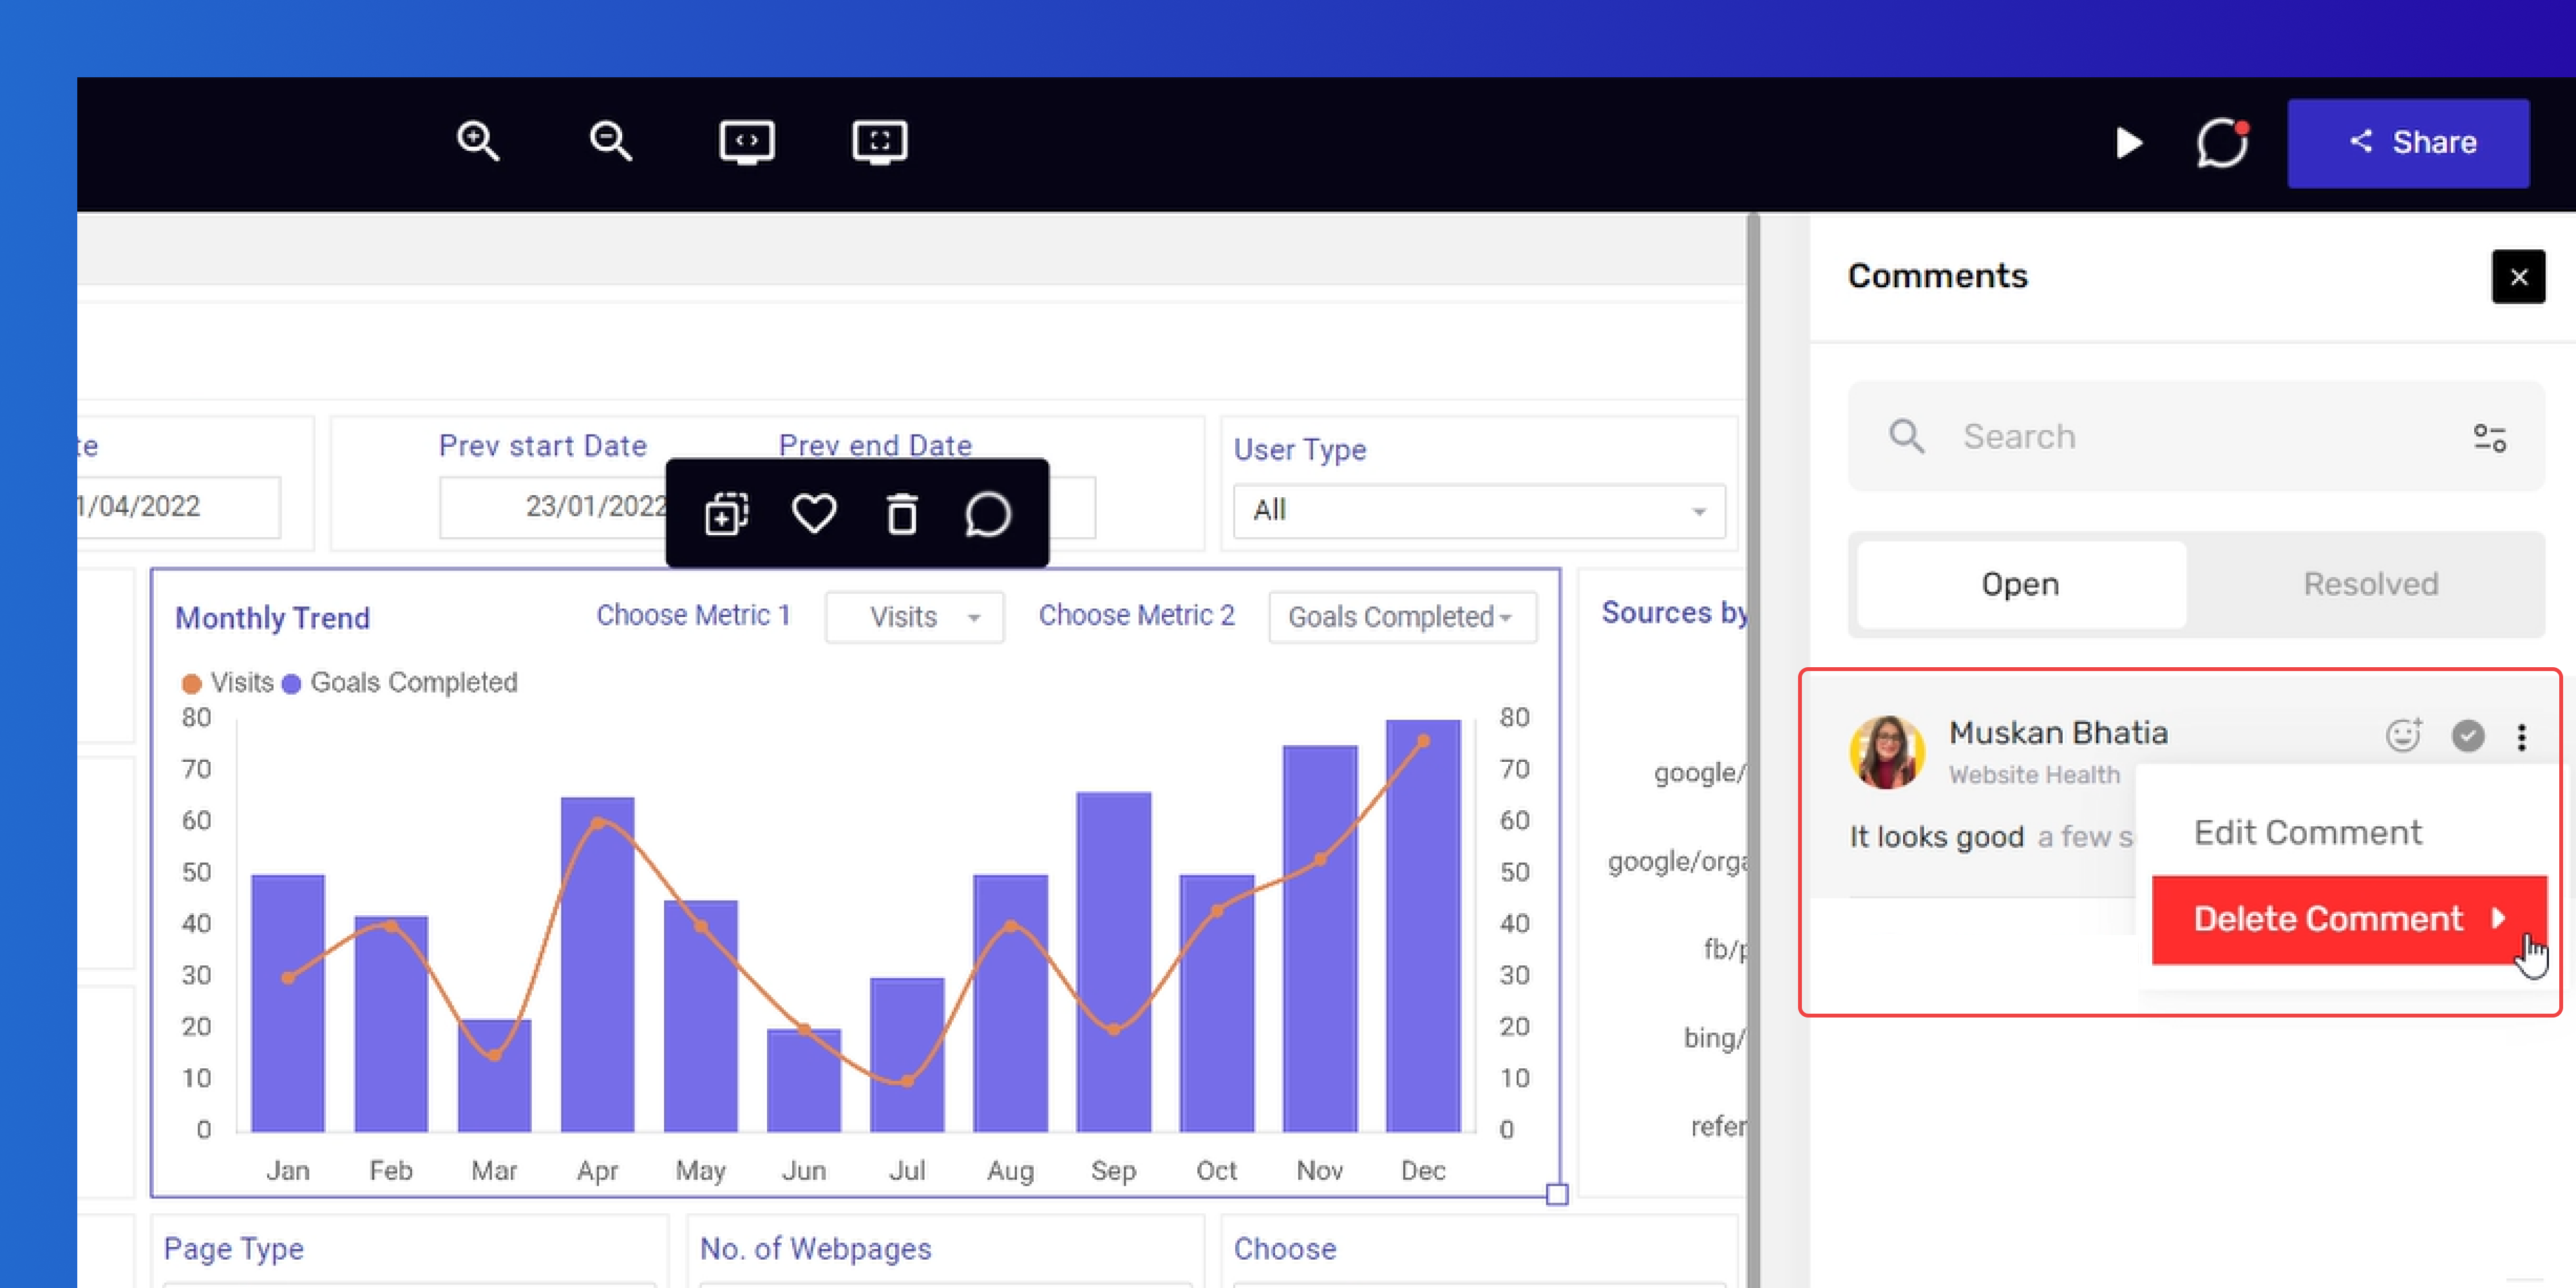
- To remove a comment from the board, click on the three-dot menu and select the Delete option.
Add a Team Member
Collaborate with your teammates by simply @mentioning them. They will receive a notification and email to join. @mention team members in comments: this allows you to include a team member in the comment thread or draw their attention to a specific part of the dashboard wireframe.
To invite the team members to the comments, you can simply tag & invite them directly from the comment section, or you can follow these steps:
- In the comment section, @mention the team member
- You’ll get an option to invite. Click on that to get the invite dialog box
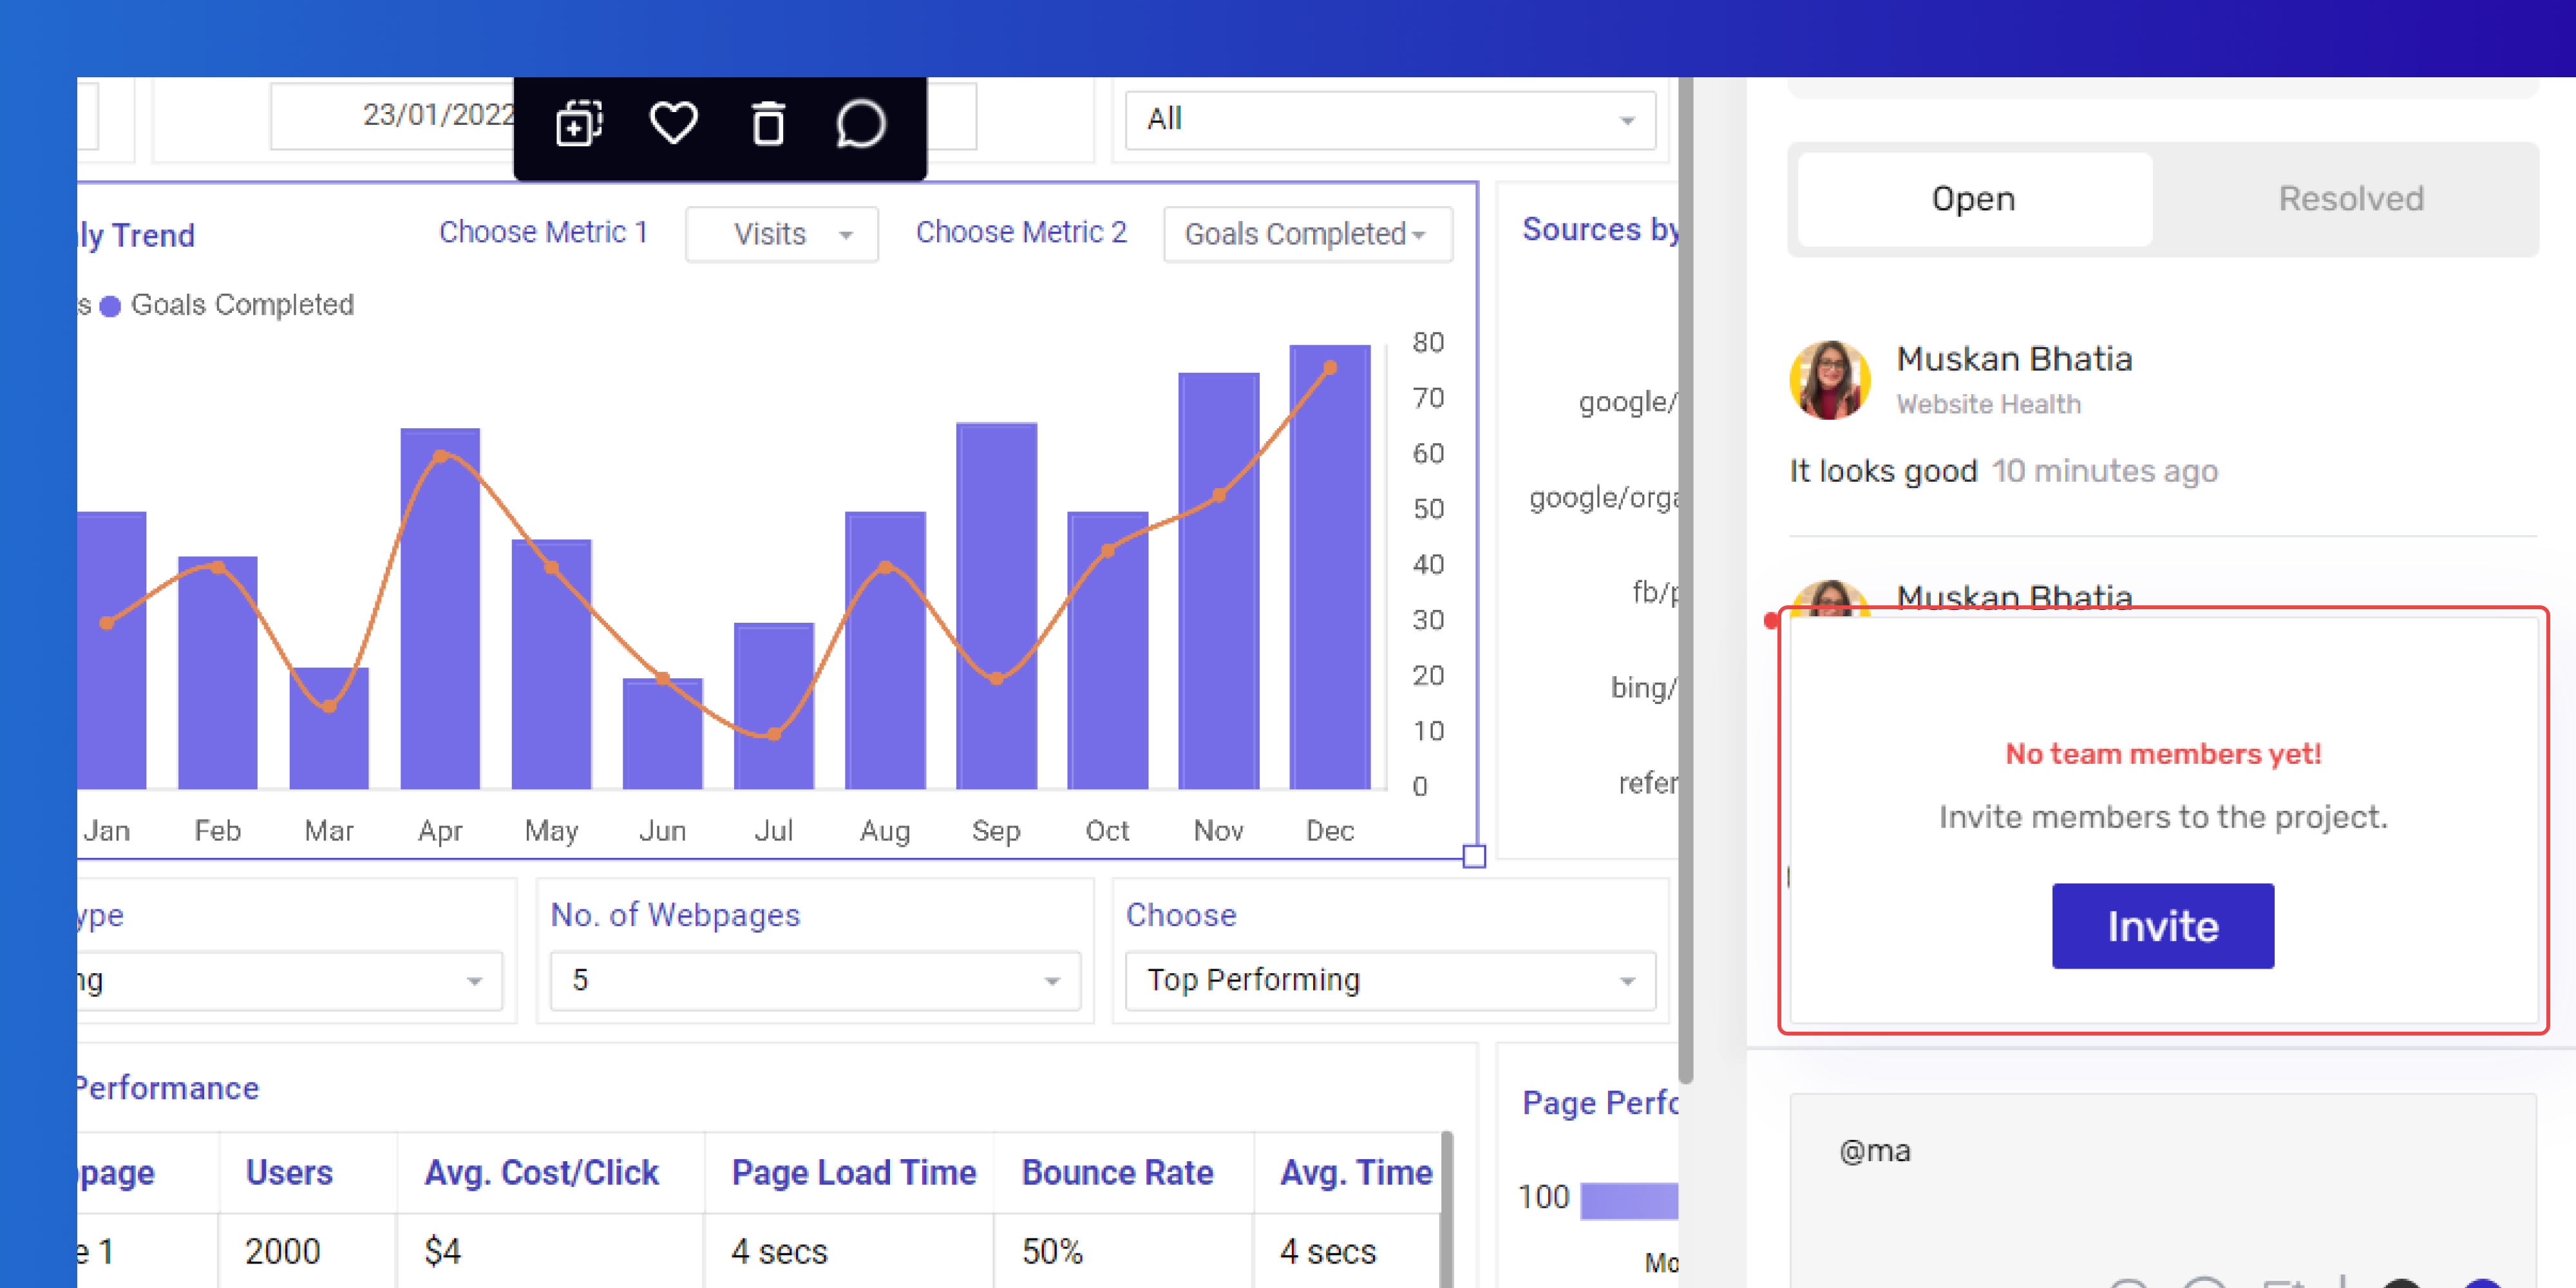
- Start typing in the person's name or email.
- Allow access to your team members based on your preferences.
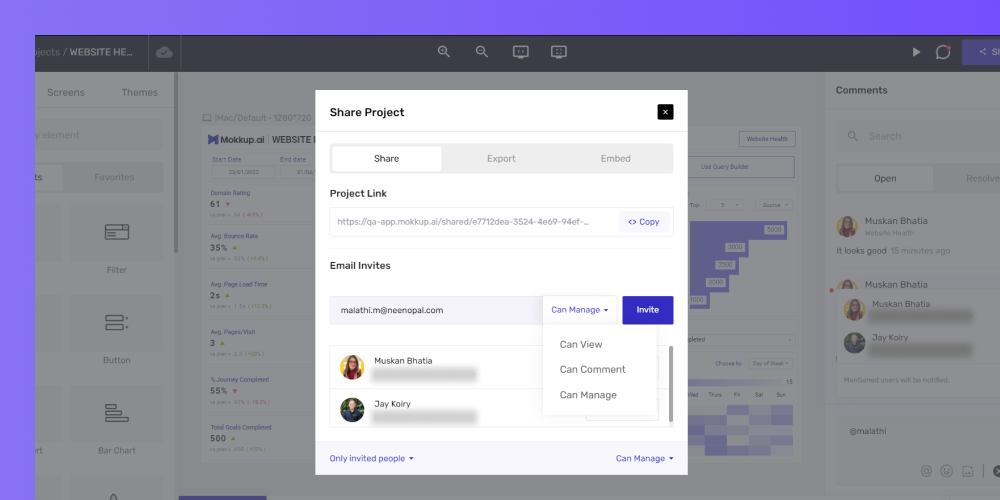
- There are some restrictions around @mention behavior depending on your role:
View: Only View the comments and dashboard wireframe.
Can Comment: Can comment/react/resolve etc.
Can Manage: Have all the access as commenting + the user can also invite others.
- After updating the invite, click on the invite button to send the invitation.
- Mokkup will email the team member with the details of your comment.
- The user will receive an invitation email as shown below:
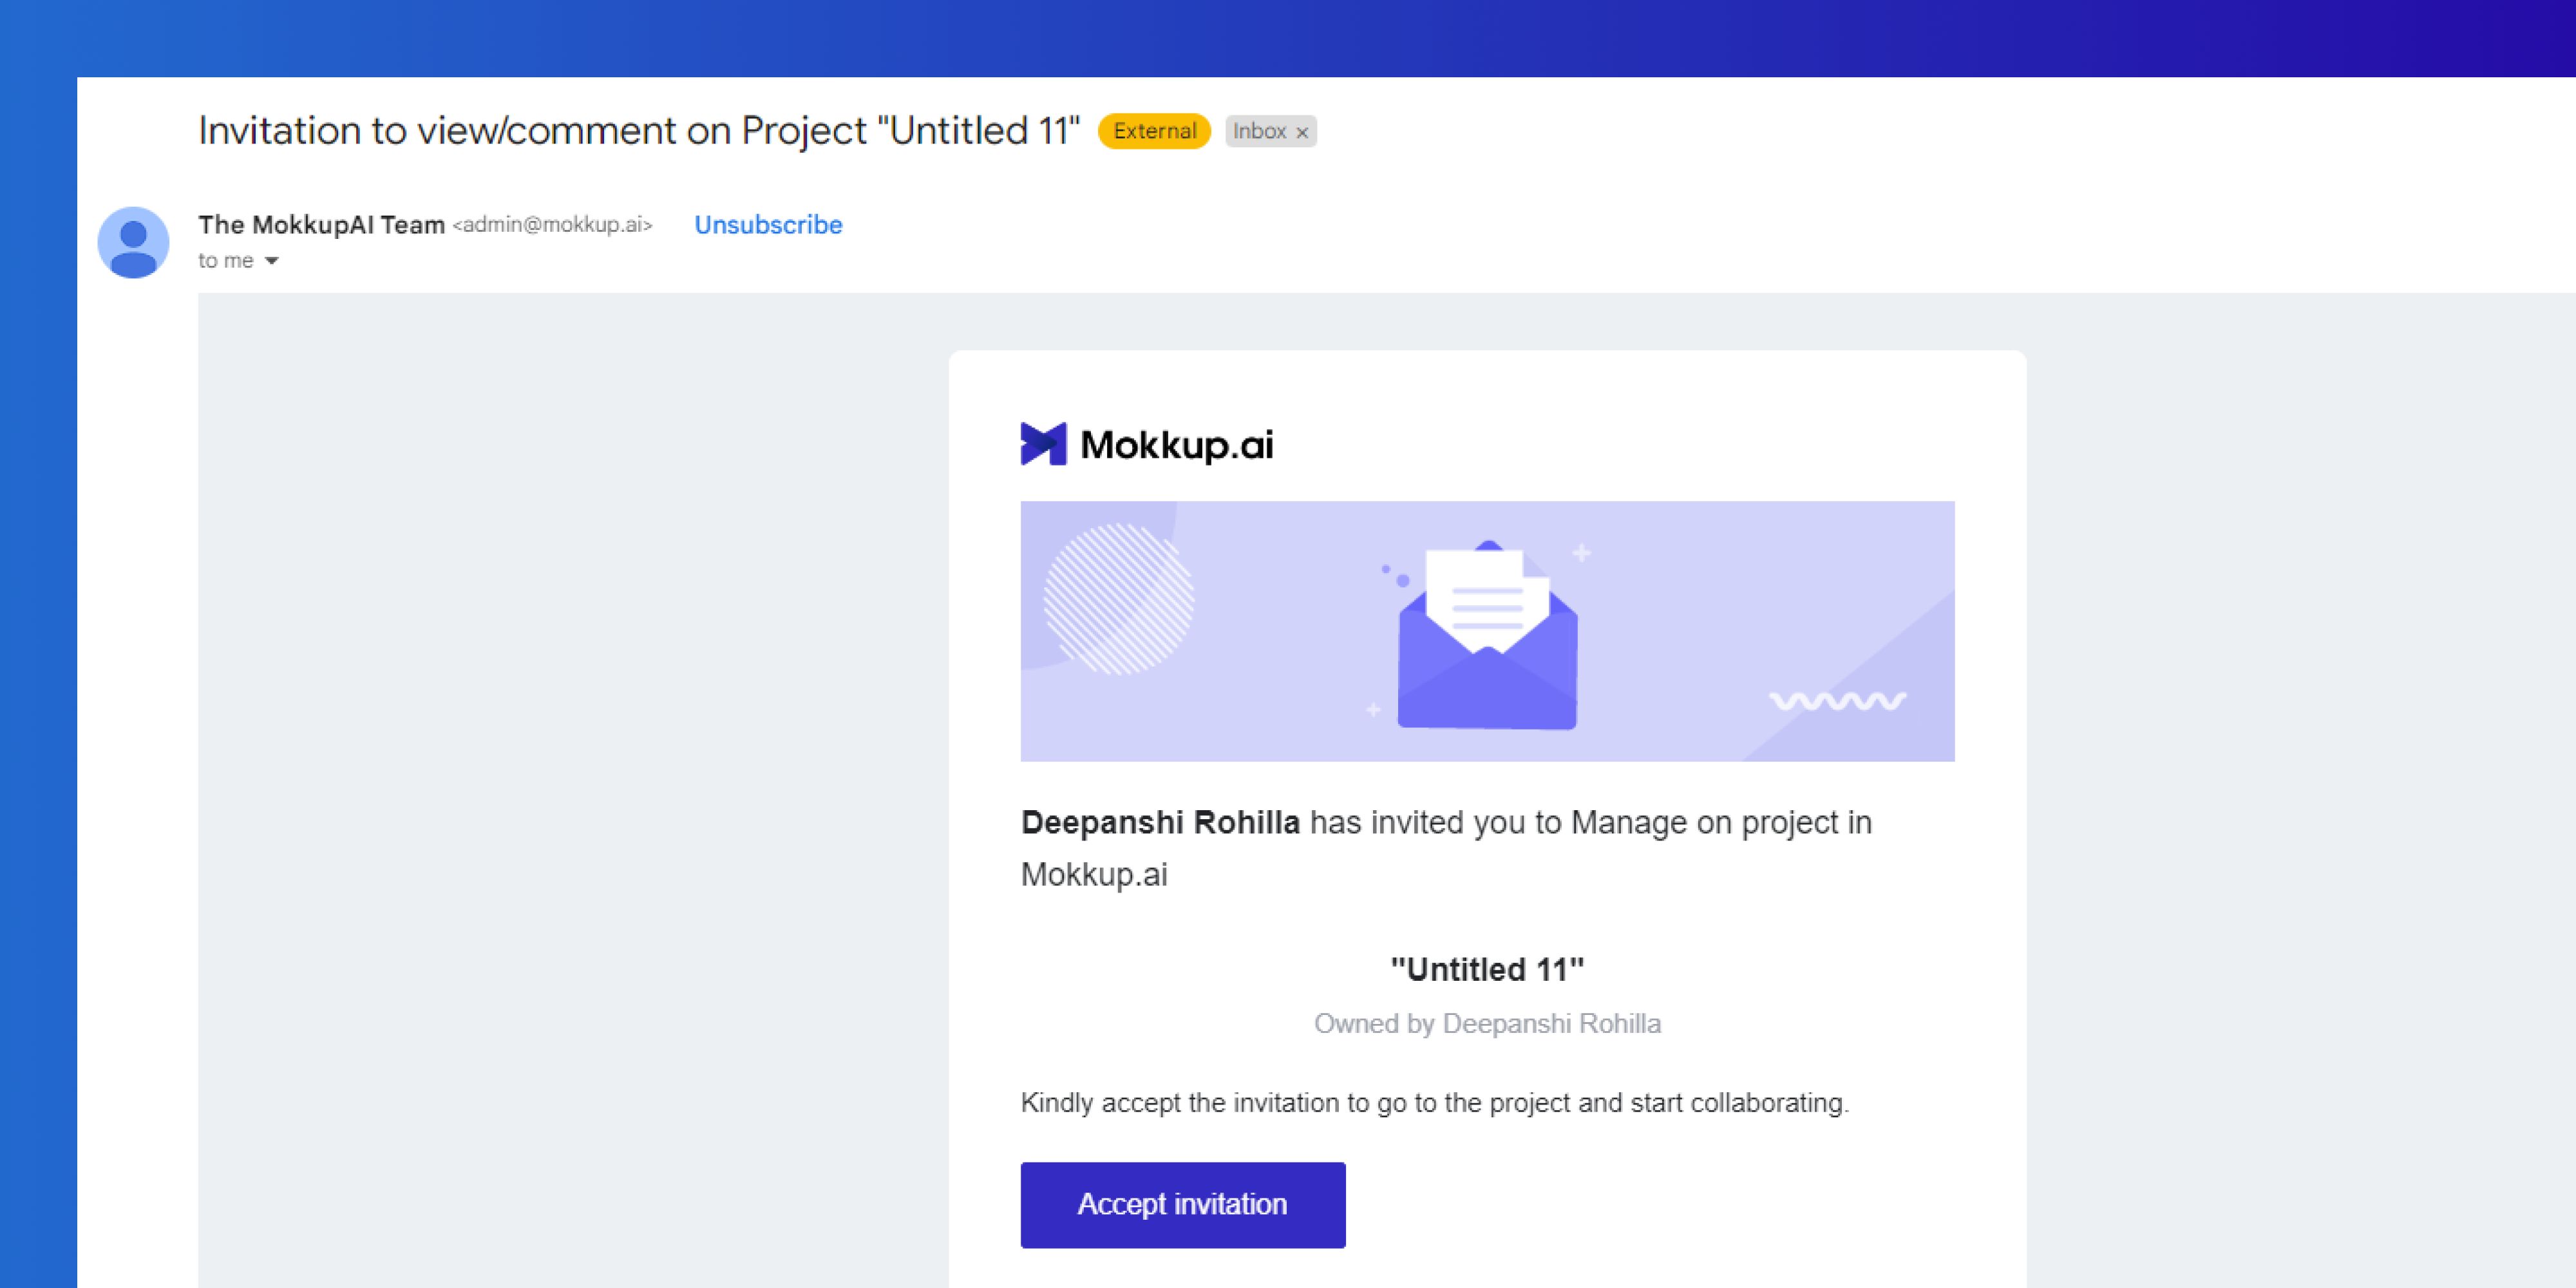
- After accepting the invitation, the team members can access the dashboard wireframe based on the access given to them.
- If the team member doesn’t have a mokkup account, they will have to create their account and then follow the signup steps. For more refer to this article <link>
Tip: Follow the same process to invite your team members by using the share button on the top bar
Add a Mention to a Comment
Refer to a team member by mentioning them when you add a new comment or respond to an existing one.
- In the comment field, use the @ symbol or press the @ key to initiate a mention.
- Begin typing the person's name or email, and Mokkup will provide suggestions based on your history of people with whom the file is shared.
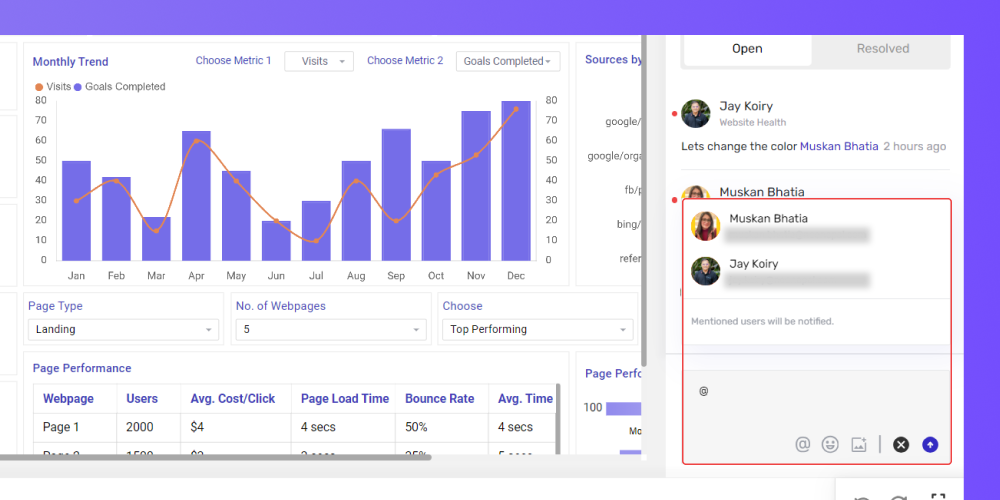
- Select the person's name from the suggested list, finish composing your message, and click enter.
- Mokkup will notify the user via email, including the comment details.
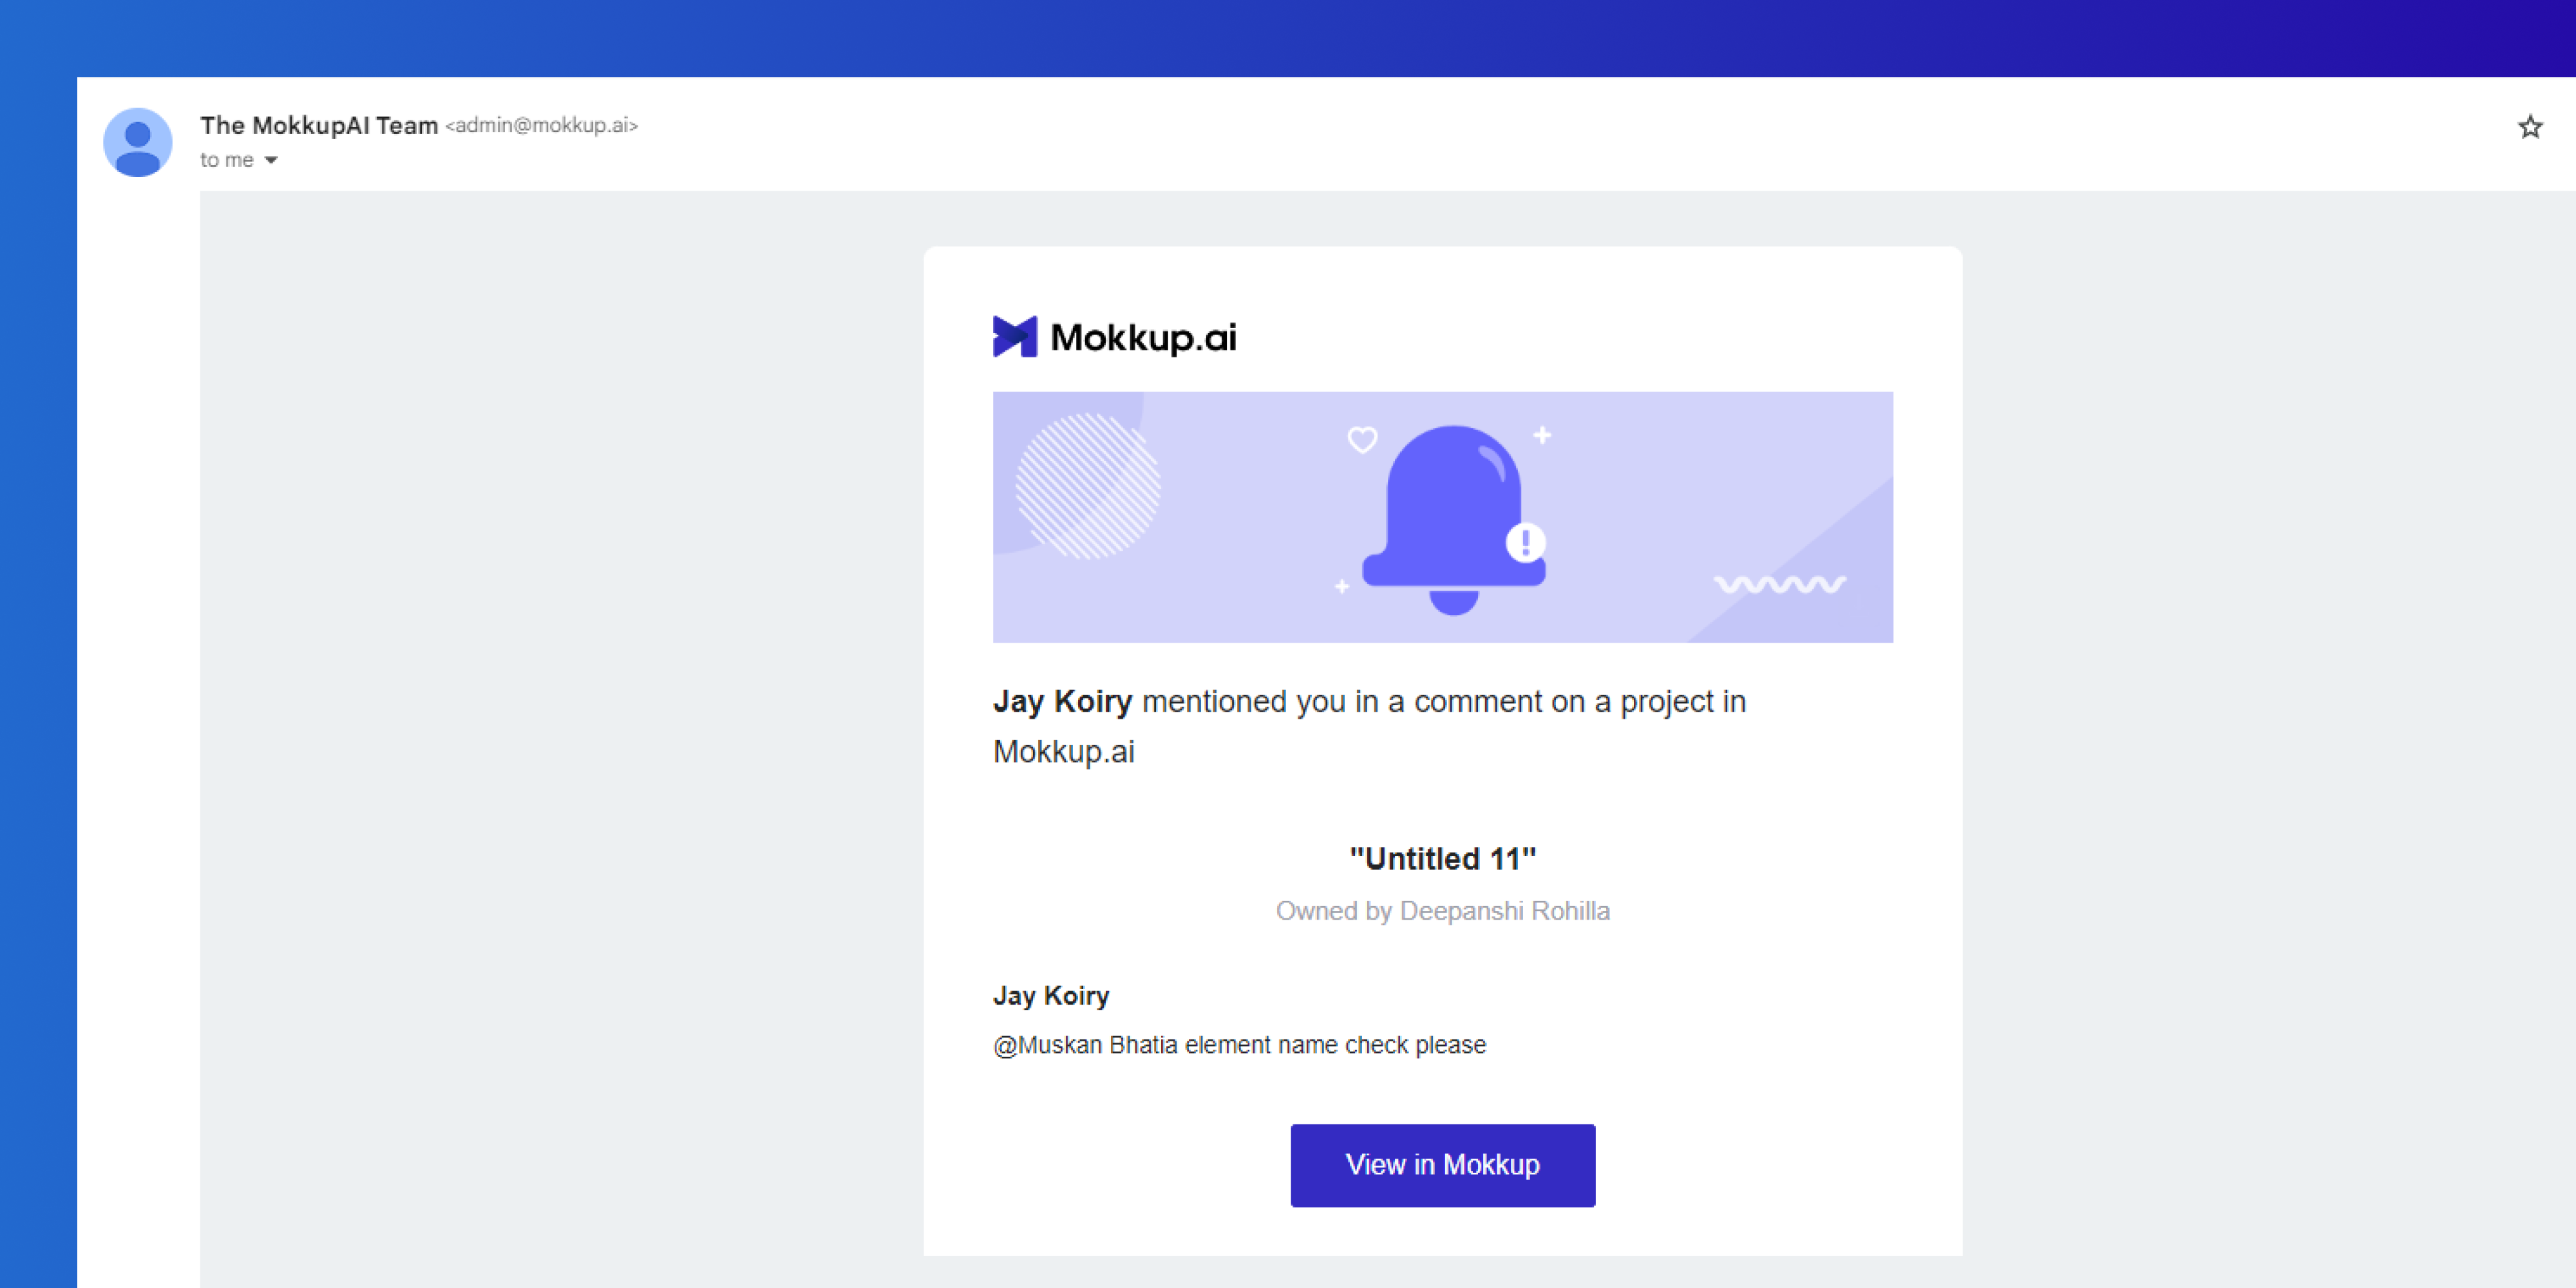
- The person can also resolve the main comments if he/she has been mentioned within them.
- You’ll receive an email after the team member has resolved the main comment (& vice versa) as shown below:
Tip: Follow the same process to add comments on the element level.
Include Images/GIFs in Comments
You can insert an image or a GIF while commenting in JPEG, PNG, and GIF media formats.
For adding the media to the comments, you can follow these steps:
- In the comment section, click on the image icon.
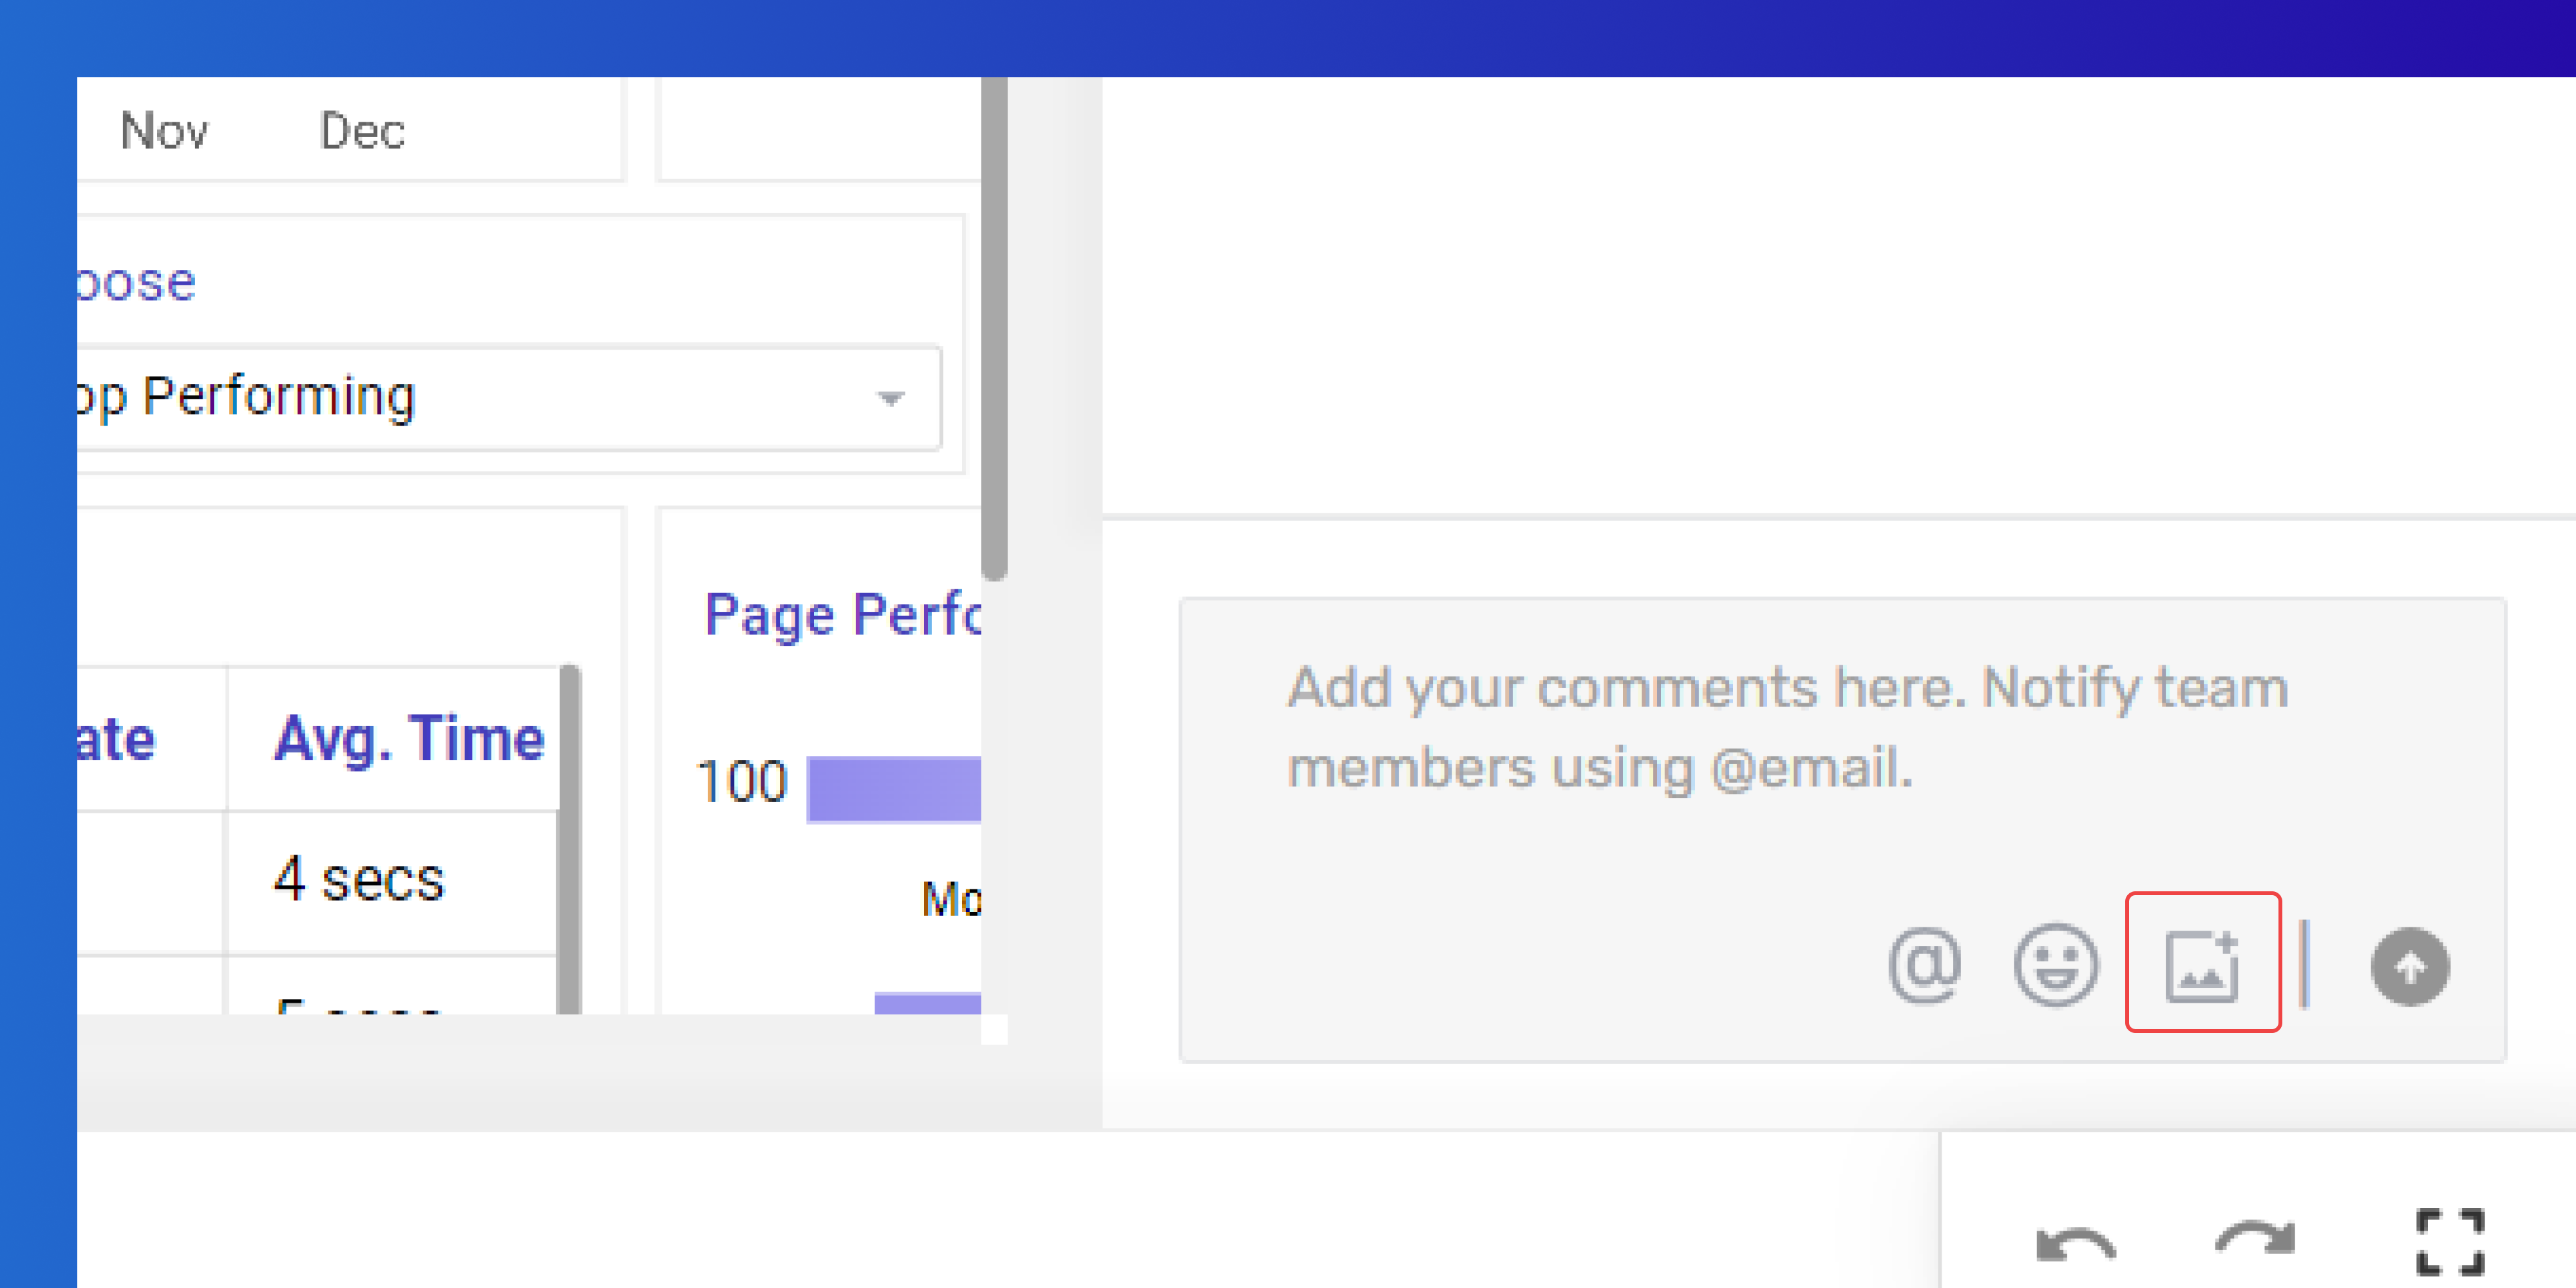
- Select the image or GIF you want to add from your local files.
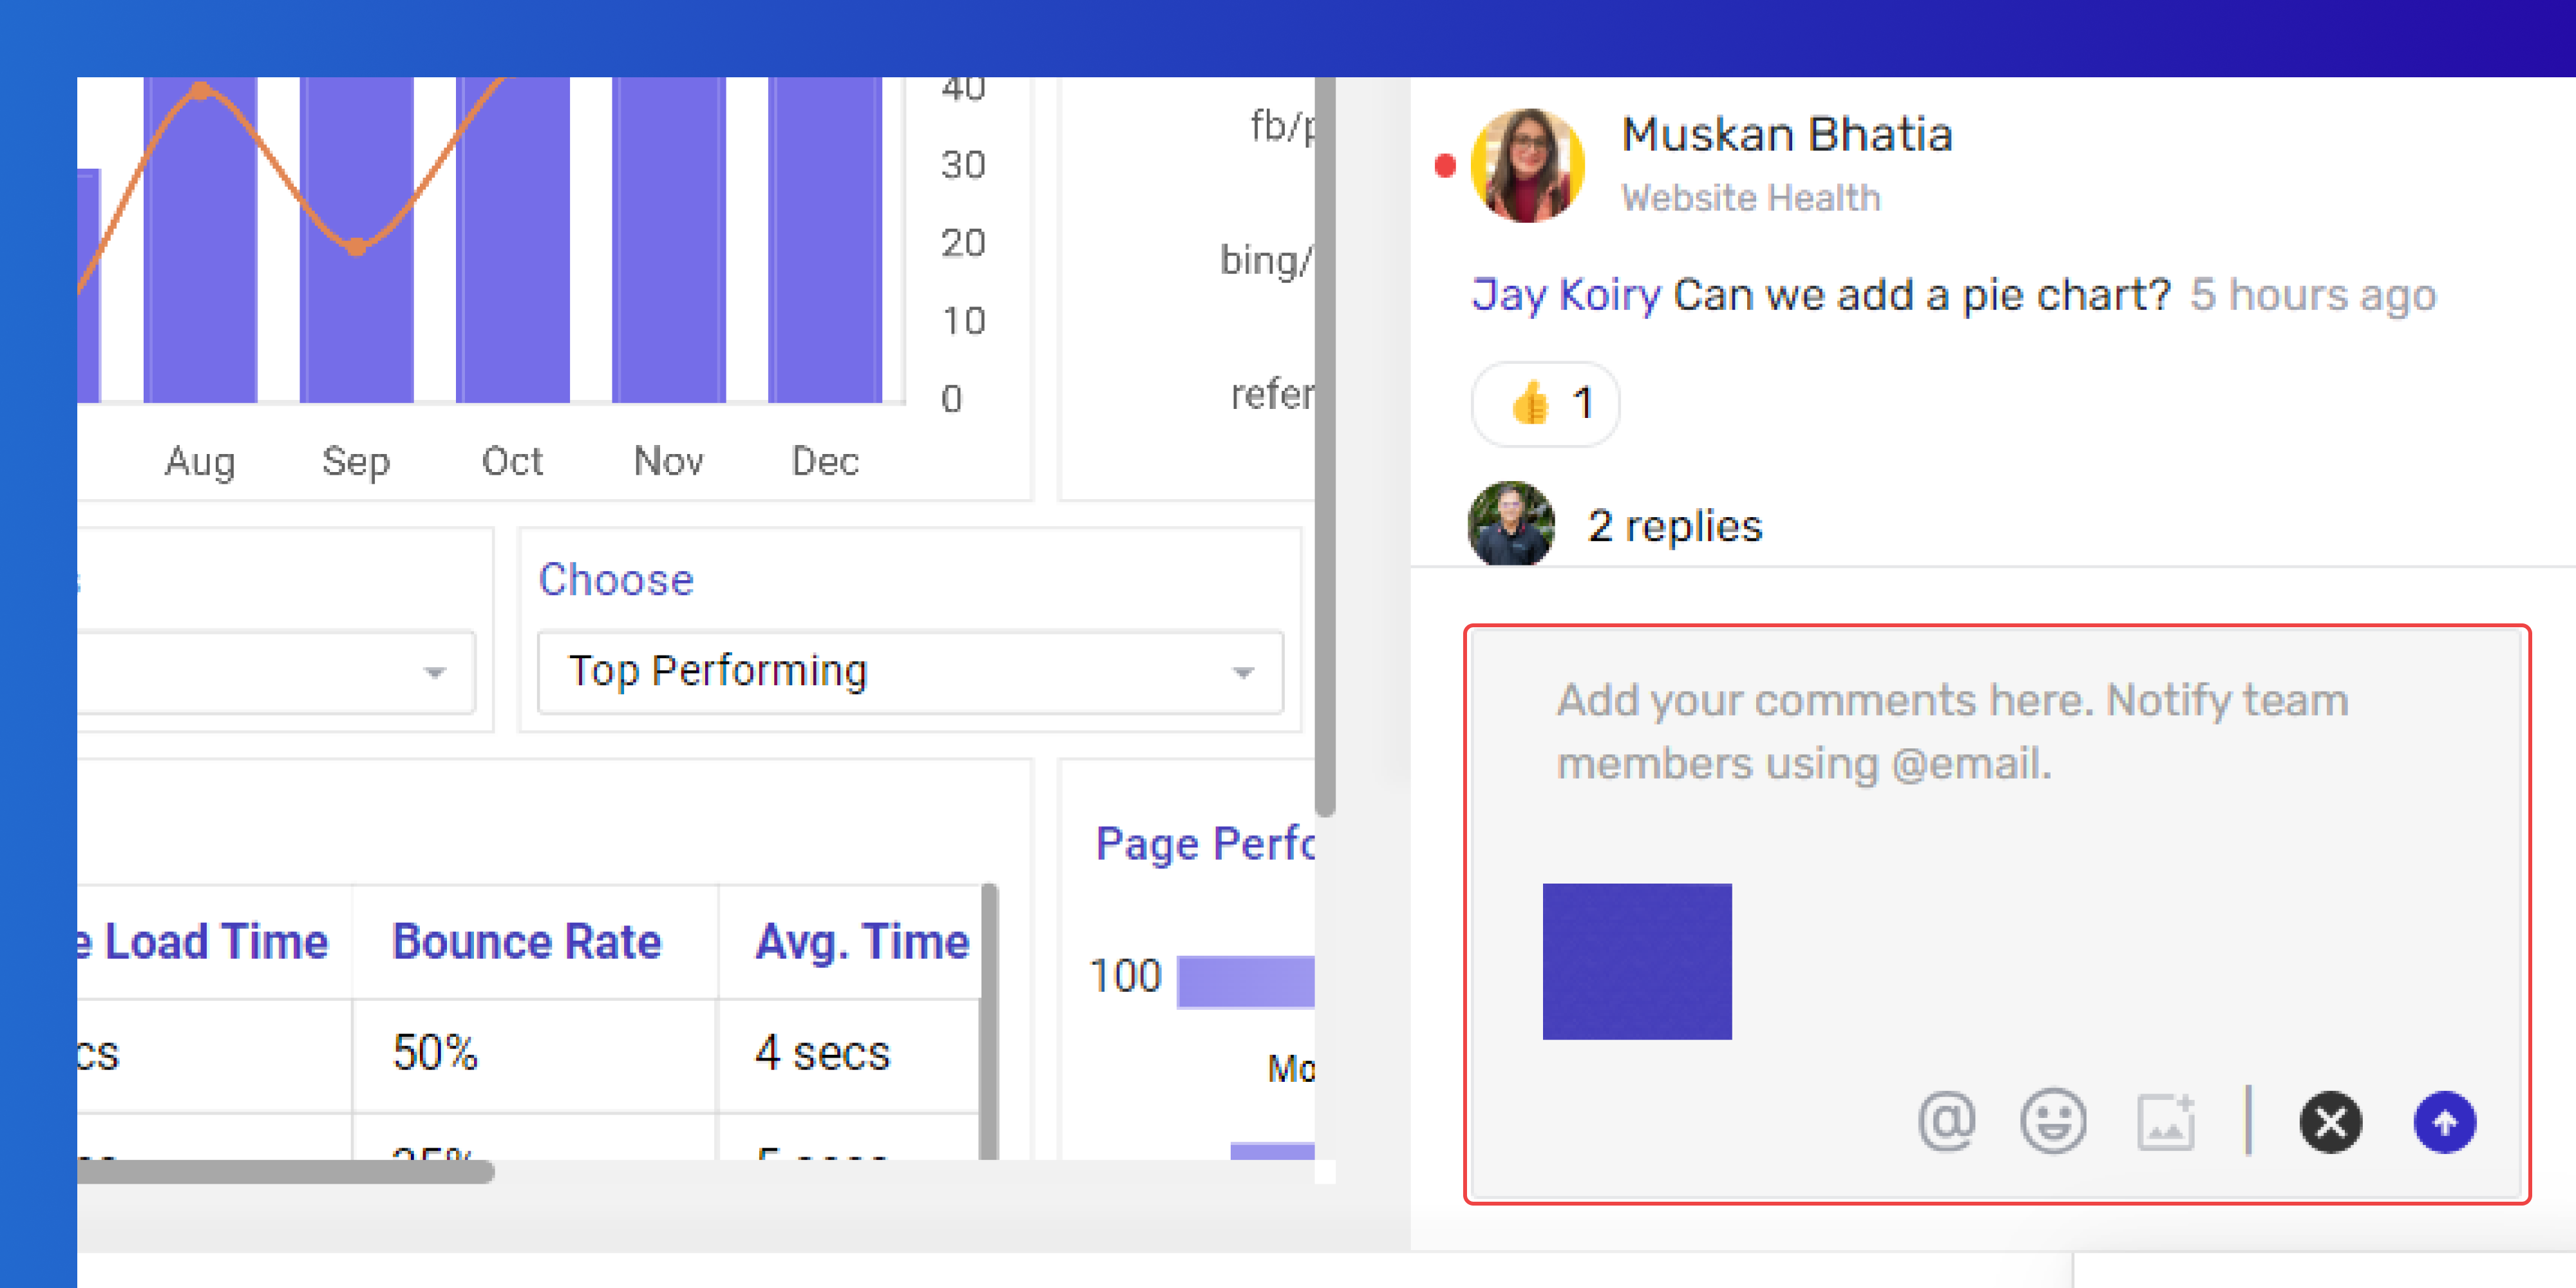
- Once you've added the image or GIF, either click the white arrow icon enclosed in a blue circle button or press "enter" to post your comment. You can share one image at a time.
To Remove the Attachment:
To remove your attachment, simply click the "X" in the top-right corner.
Tip: When sharing specific media with a team member, use "@" followed by their email to tag them.
Enhance Comments with Emojis
Include emojis in your comments.
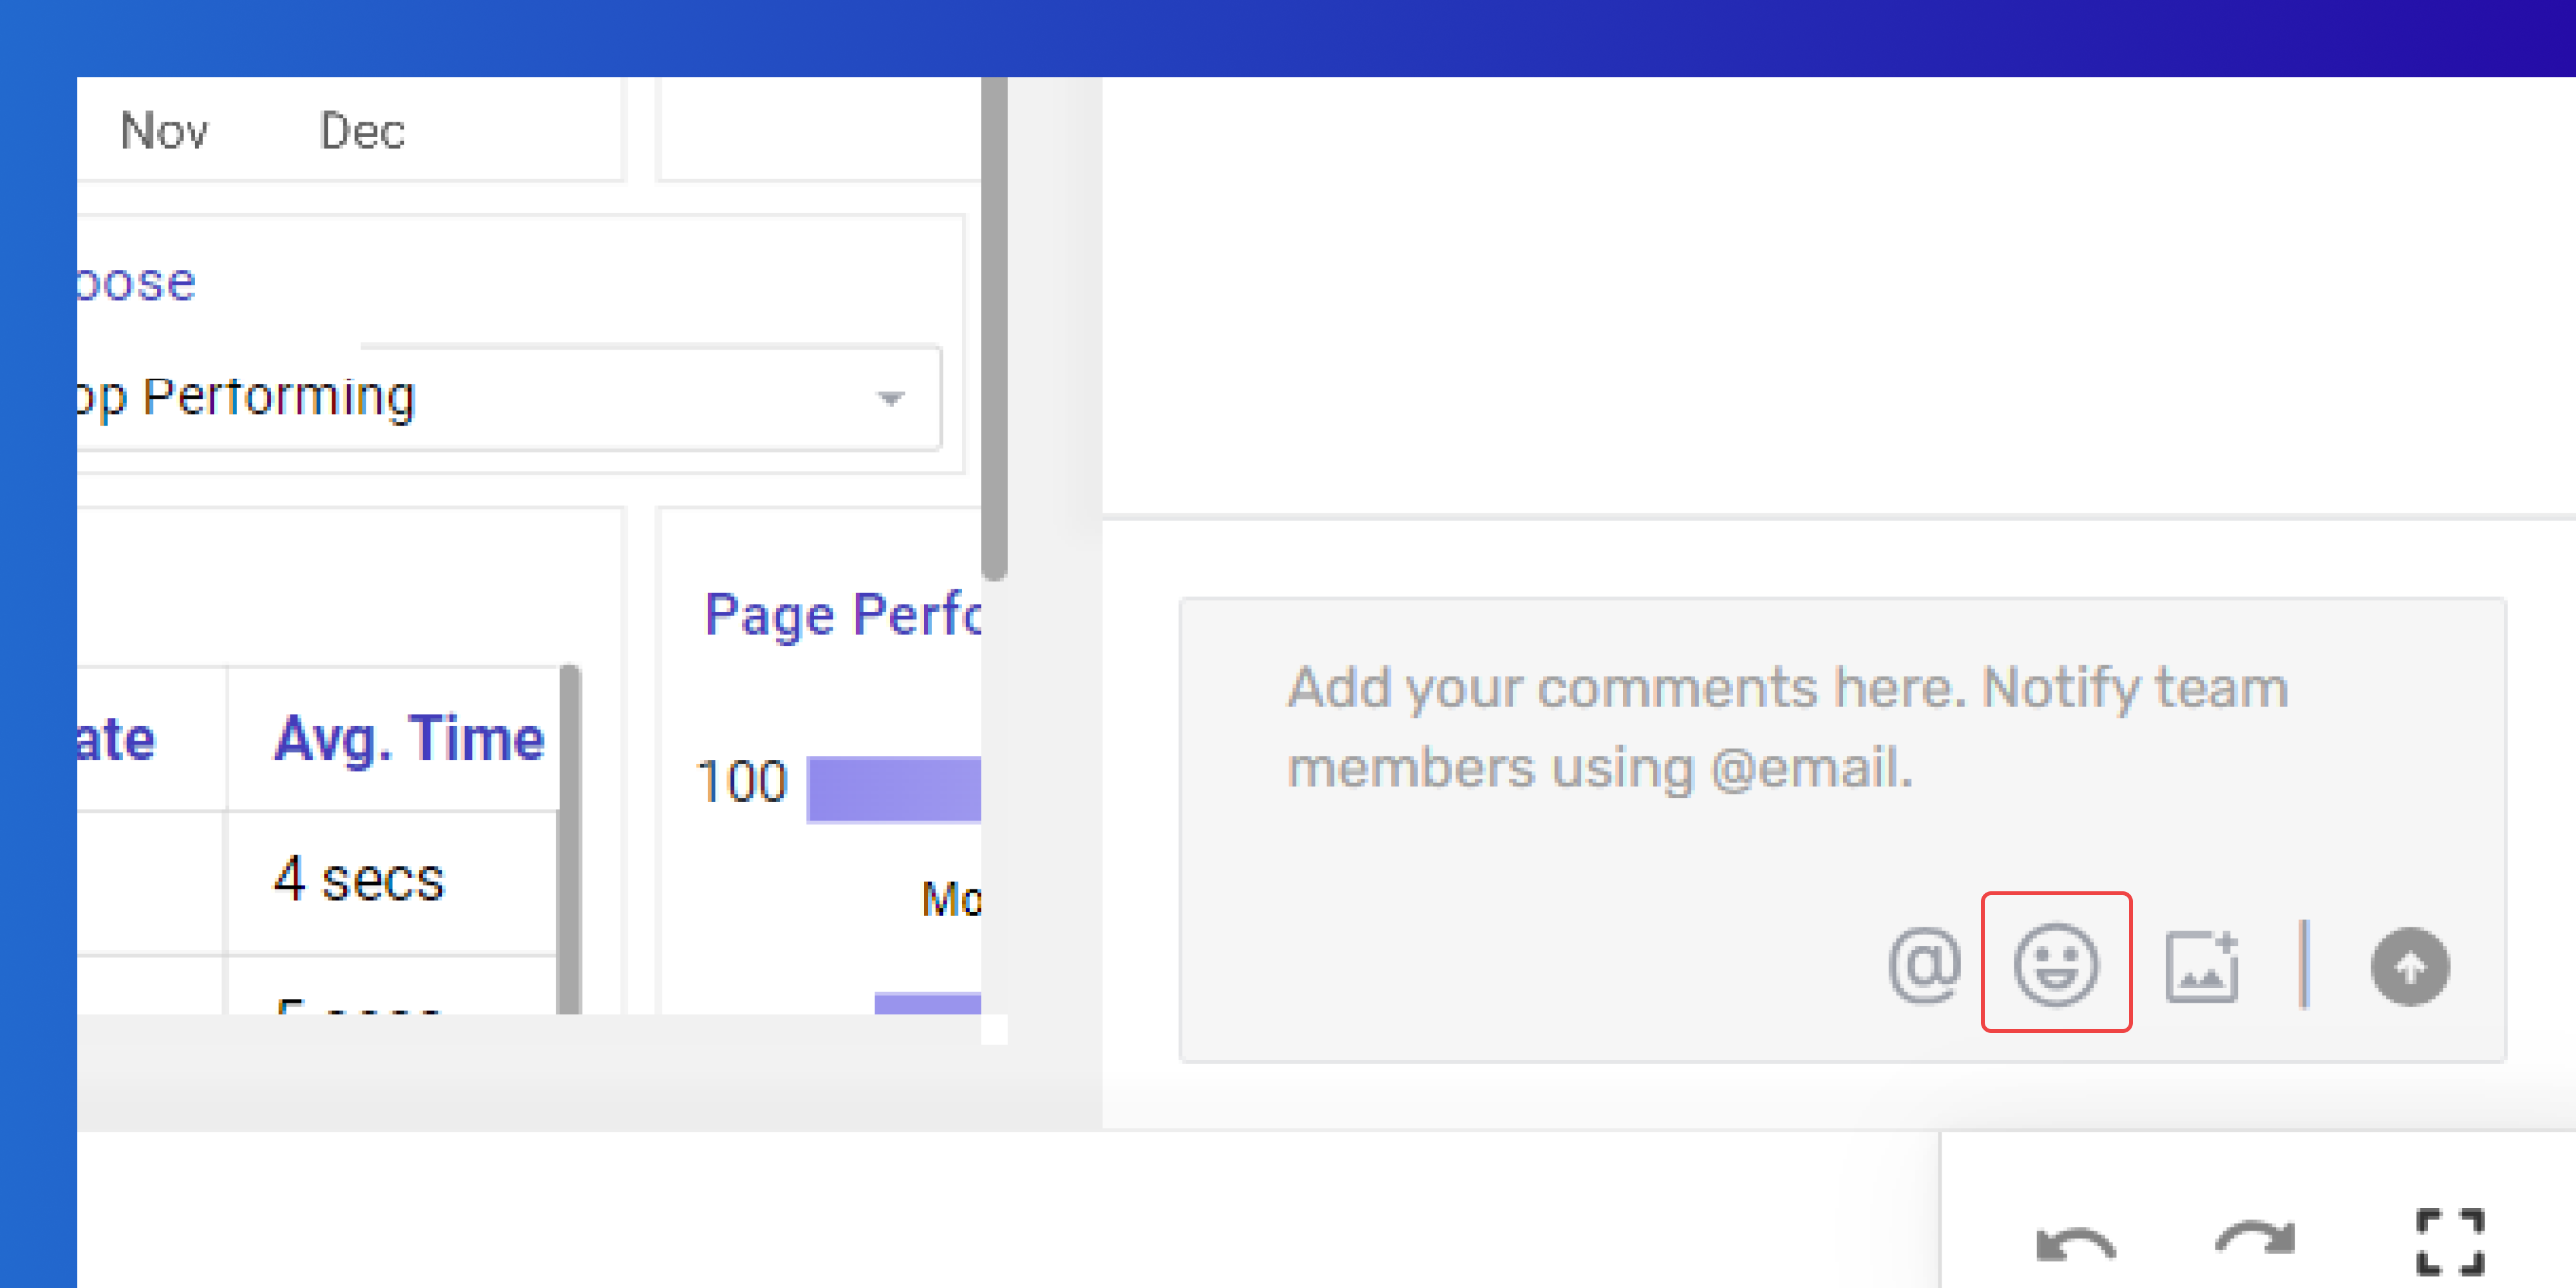
In the comment section, type your message and click on the smiley icon.
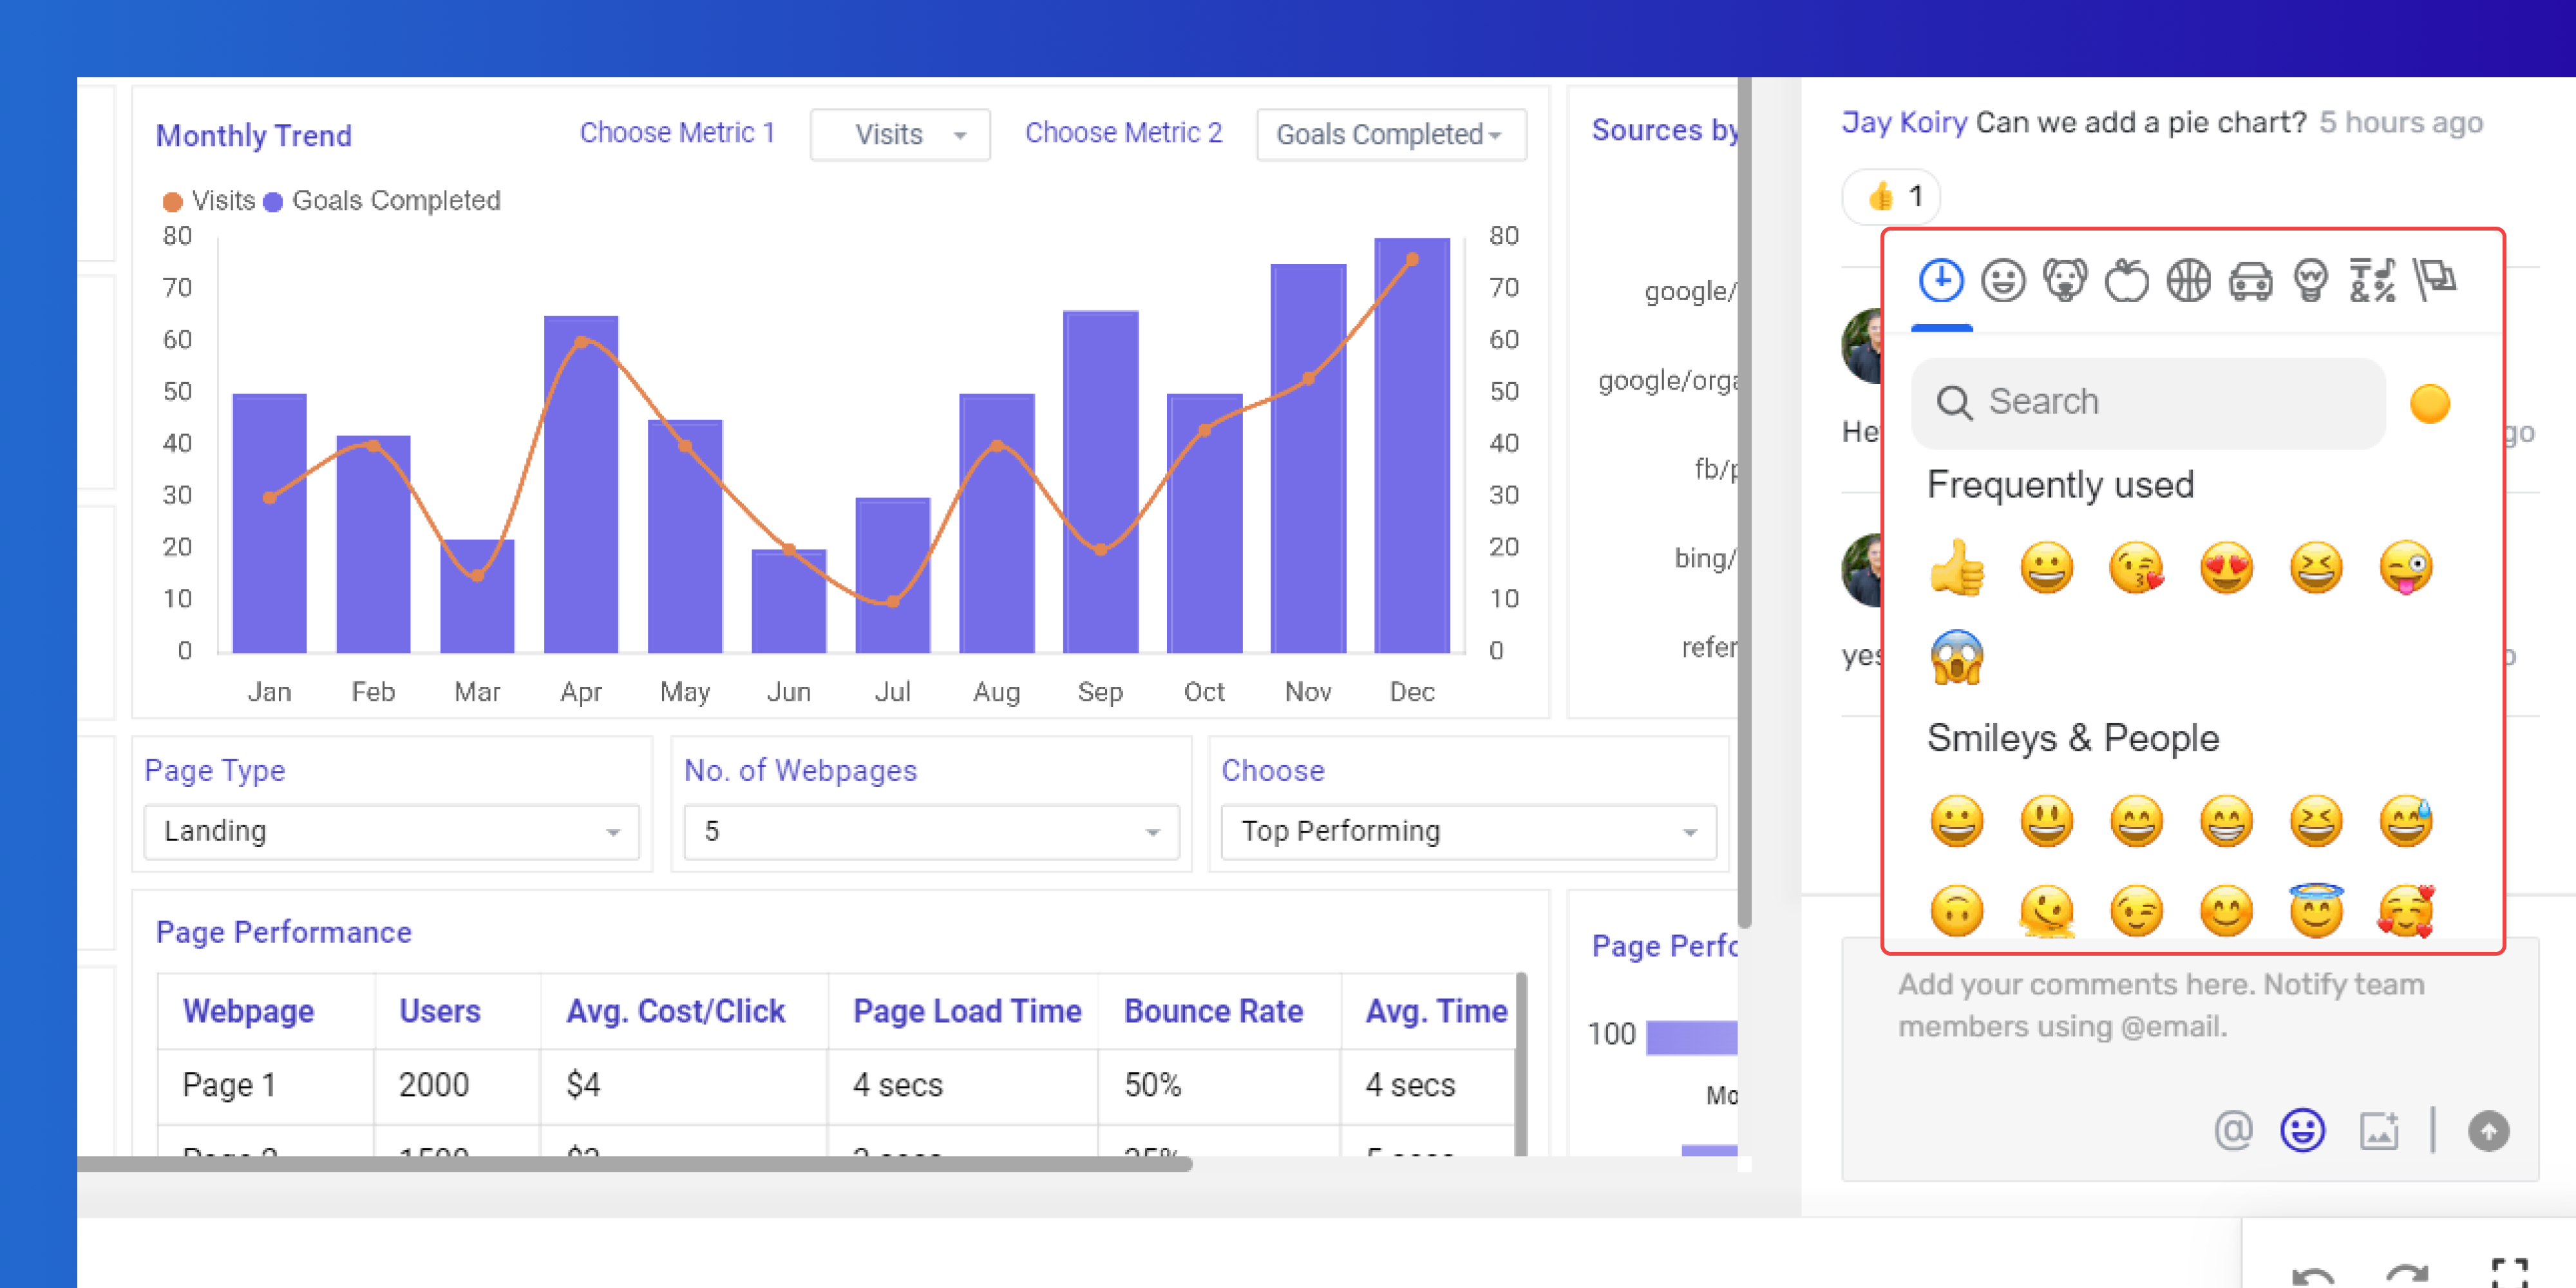
Choose emojis either from the commonly used ones or browse through a wide selection available. Select the emoji, then tap the blue arrow icon to add your comment.
Search Emojis
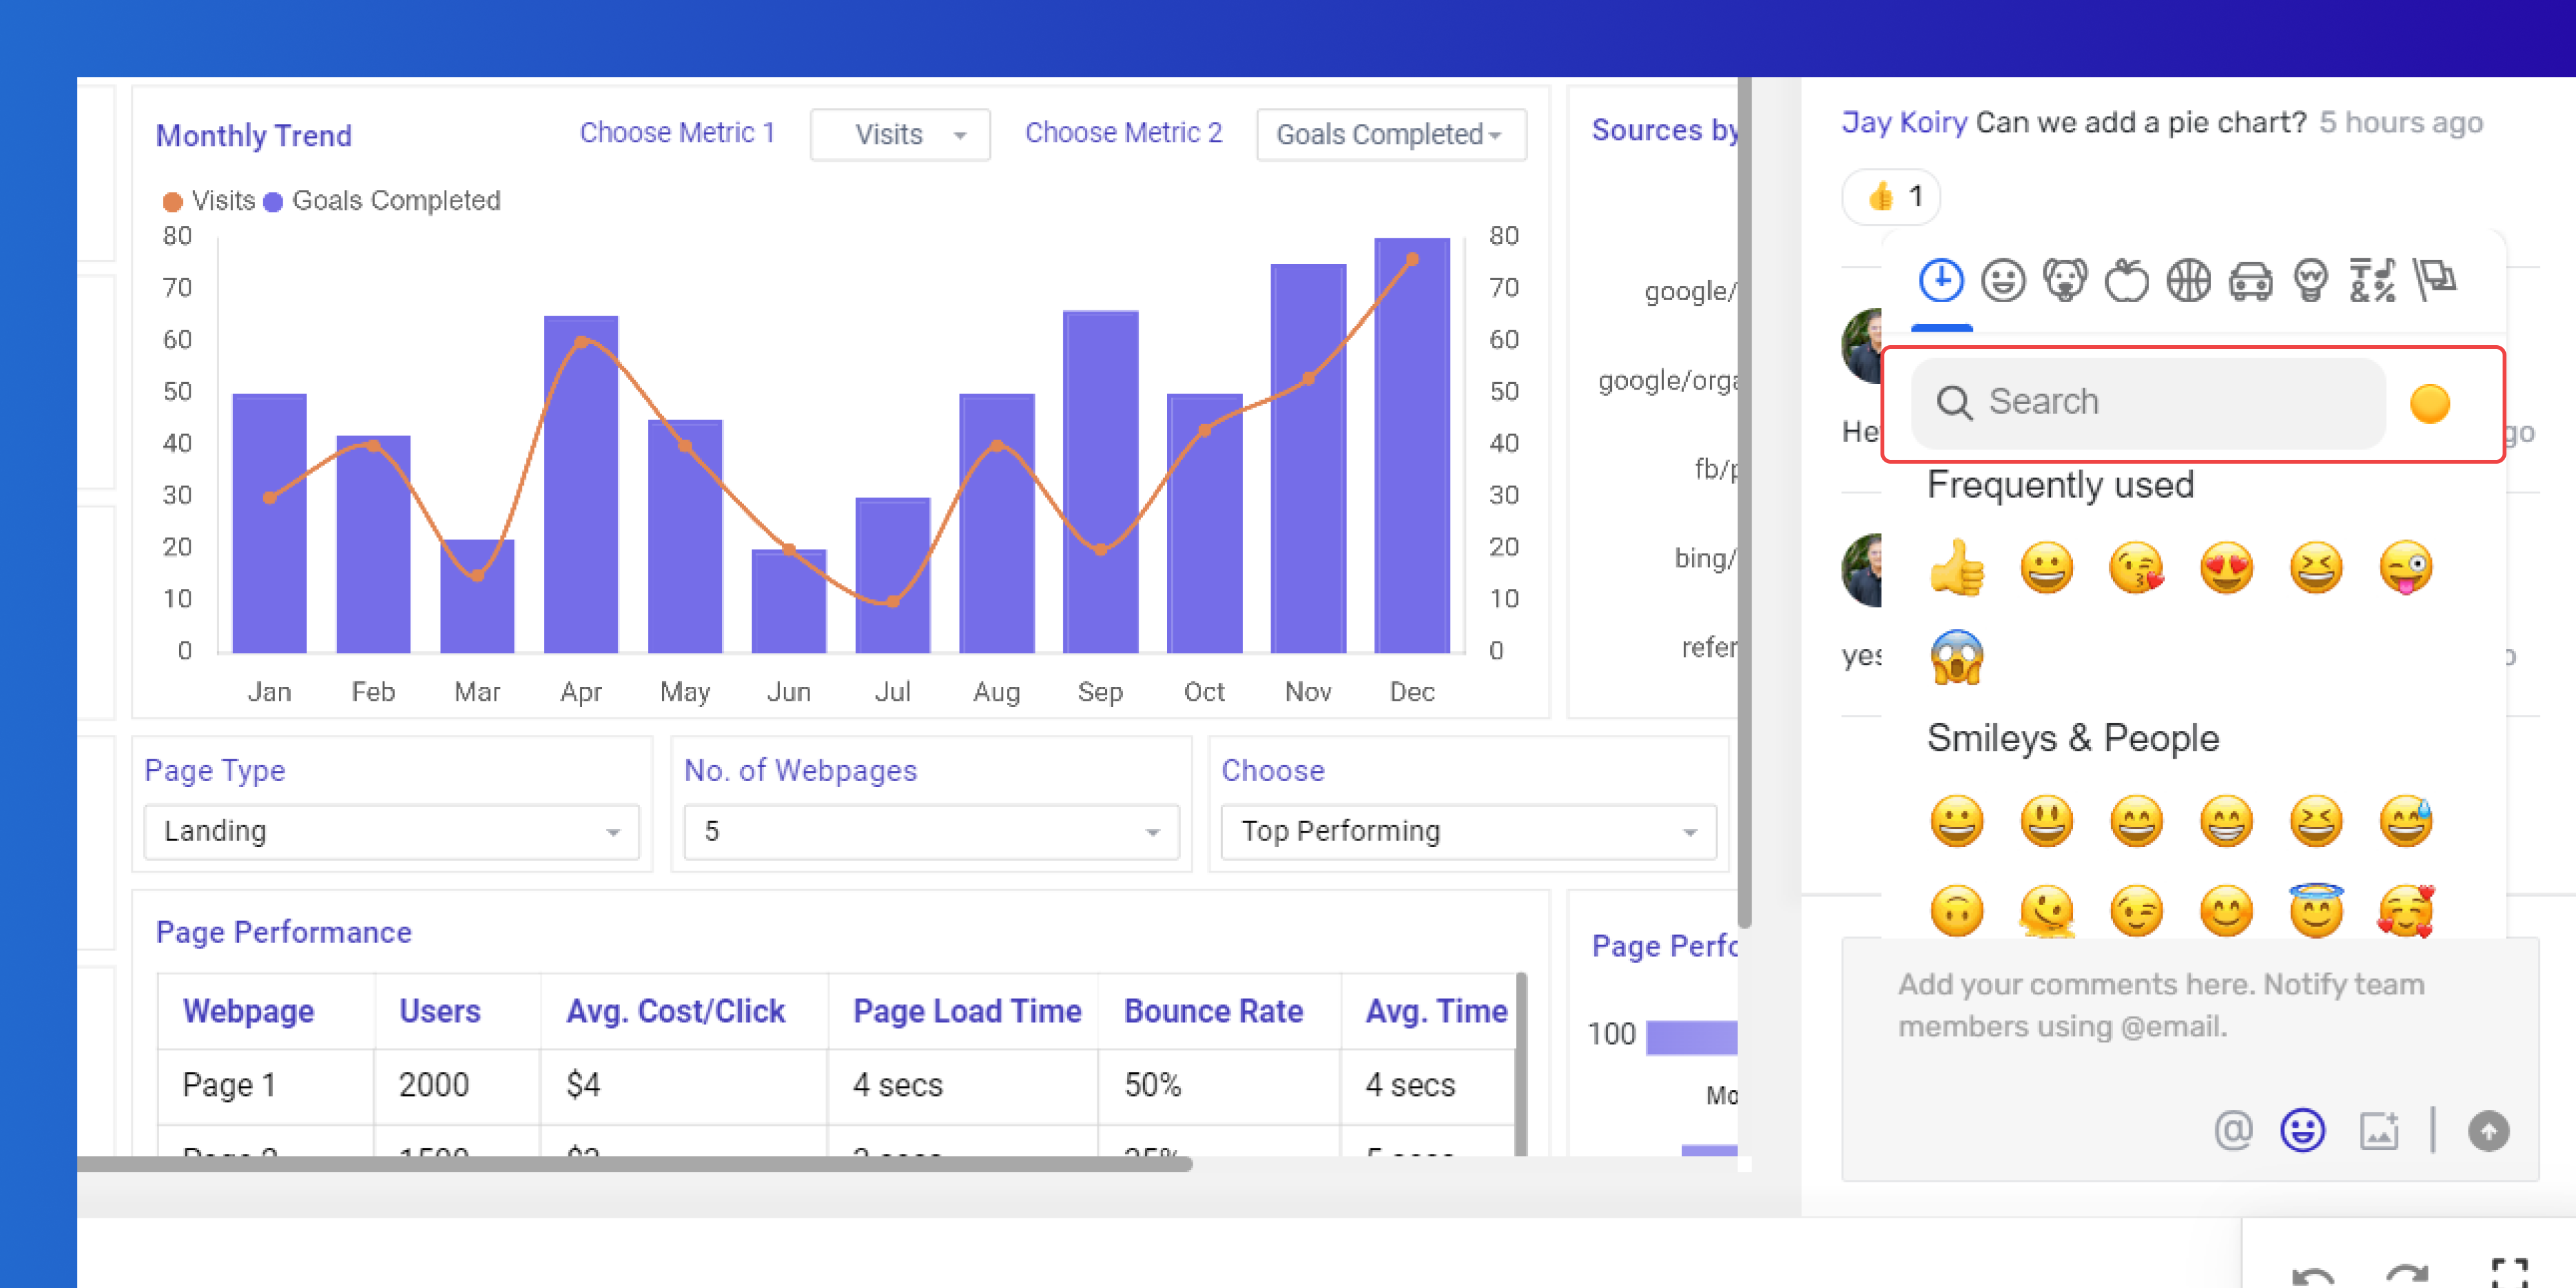
To find a particular emoji, use the search bar or browse through the emoji catalog to locate what you’re looking for.
Emoji Default Settings
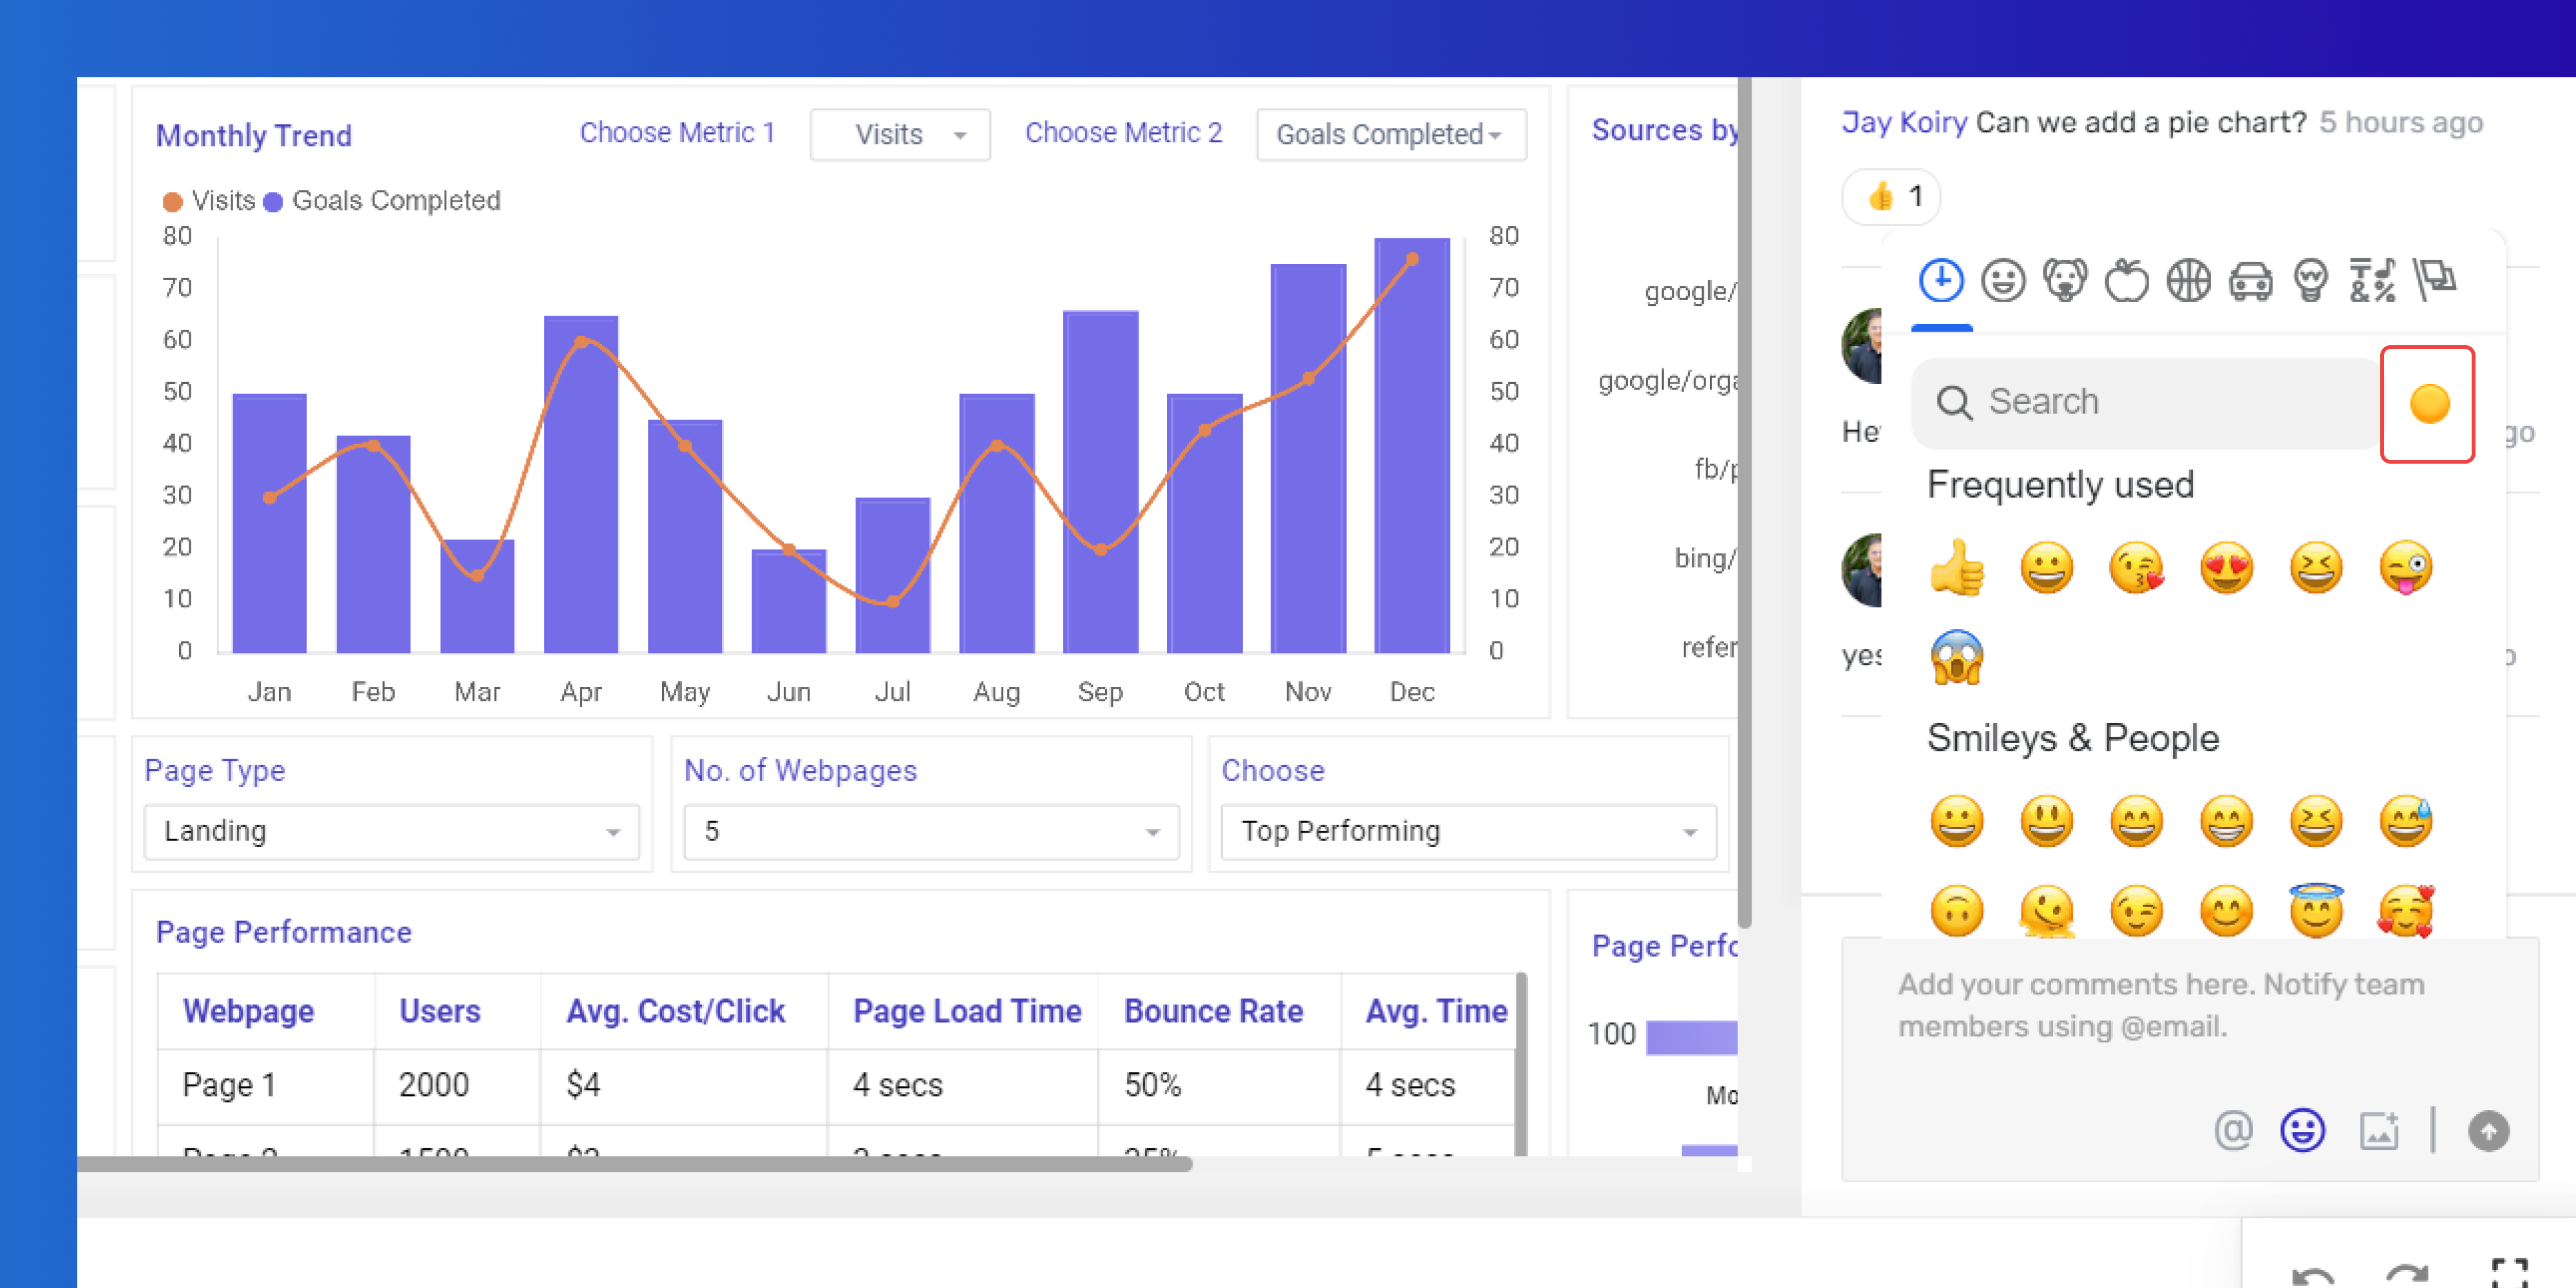
To adjust the default color tone of your emojis, tap the circle beside the search bar.
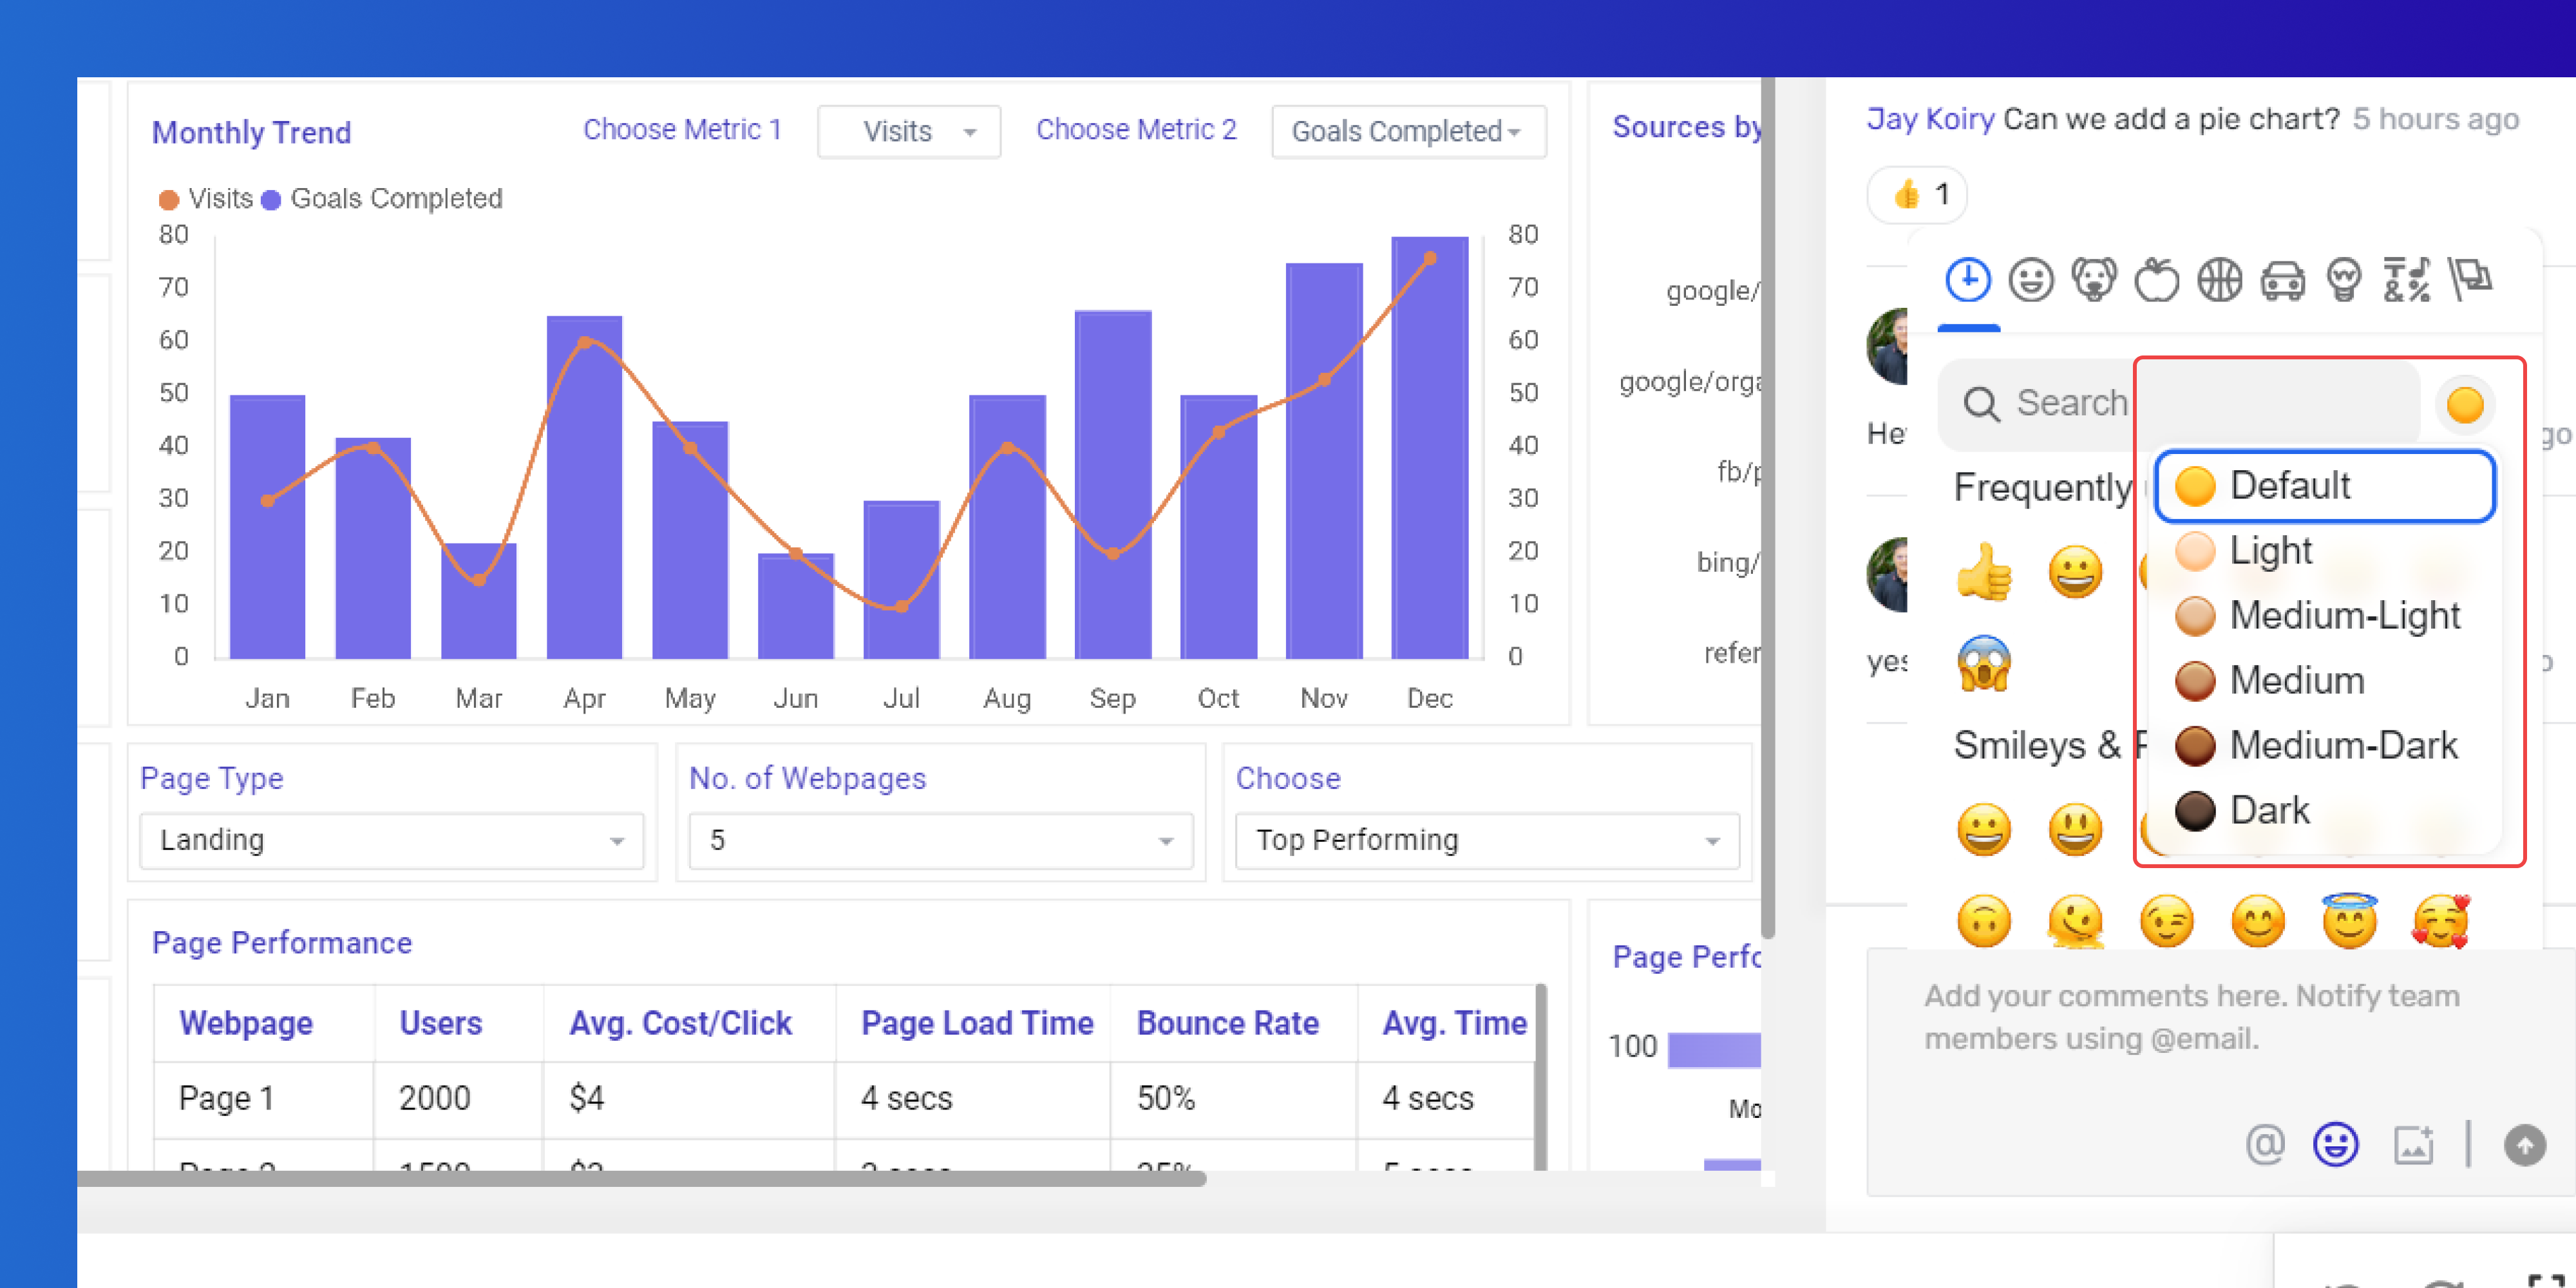
Choose your preferred emoji color by selecting from the available options.
Tip: You can access emojis quickly by pressing the Windows key and the period (.) simultaneously.
React to Comments
You can add a reaction to the comments of your team members.
Hover over the comment you want to react to and then select the smiley icon.
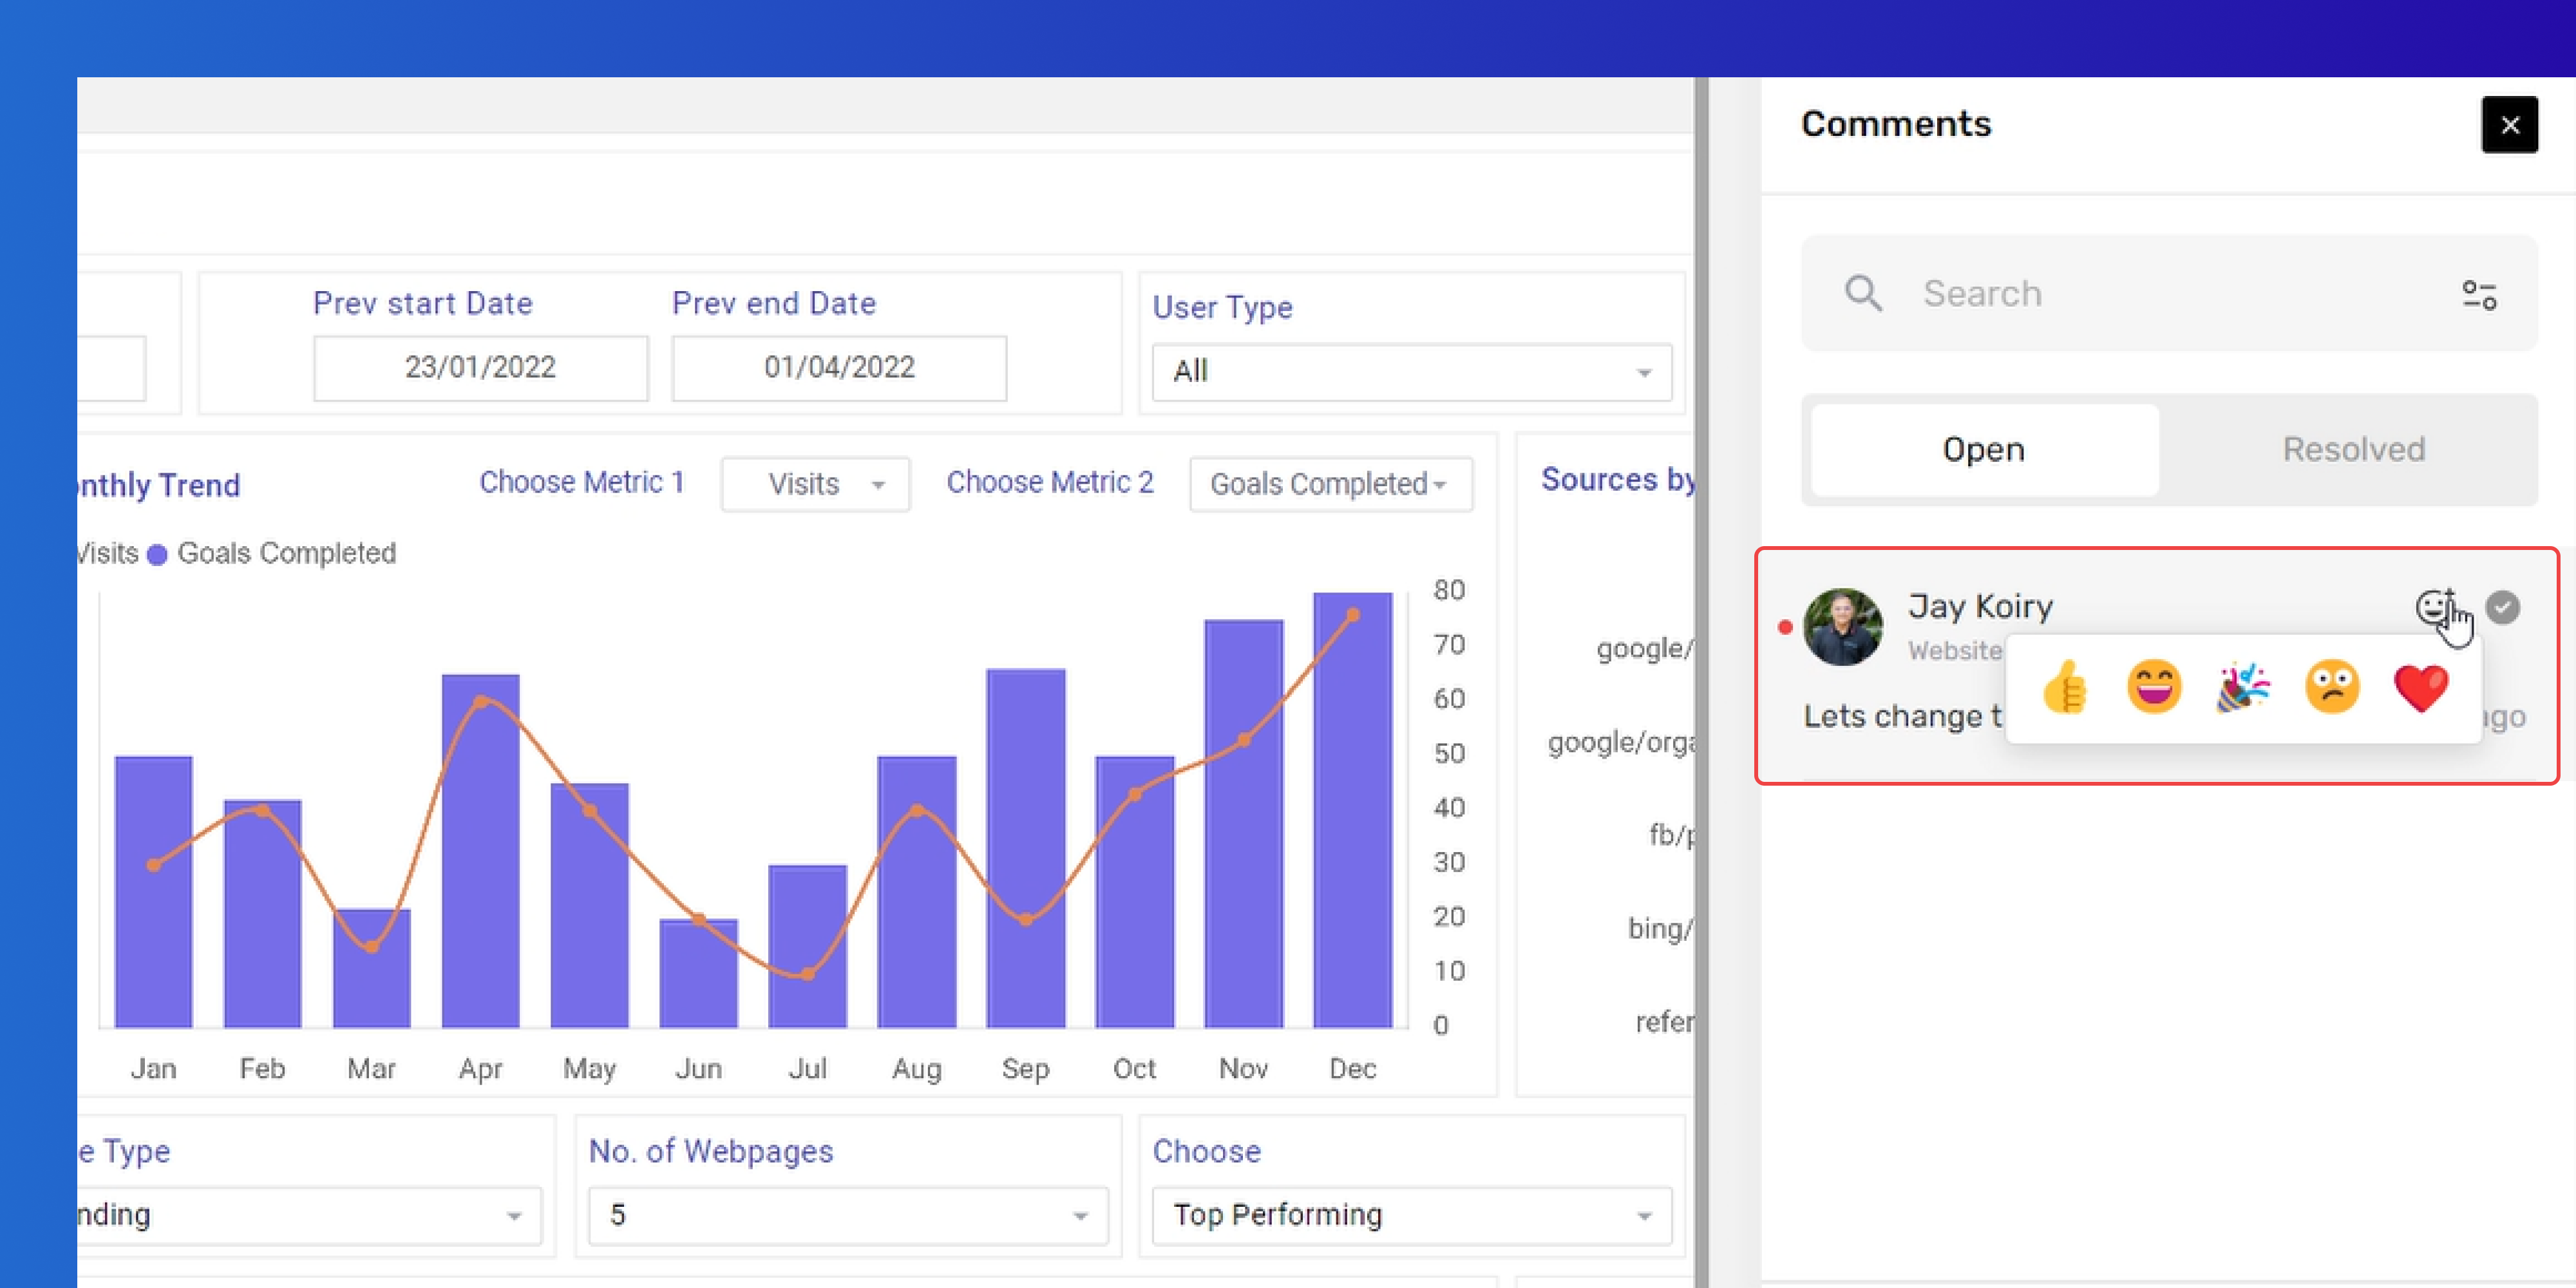
You will have the option to select from various emojis to add your reaction. To remove your reaction, click on the emoji you added.
The reactions from both you and your team members will be displayed like this.
Tip: To add your reaction with the same emoji, you can simply click on the reacted emojis.