Transferring Team Ownership
When the current owner transfers ownership to another team member, the new owner gains full control over the team, including billing, license management, and member permissions.
Ownership Transfer
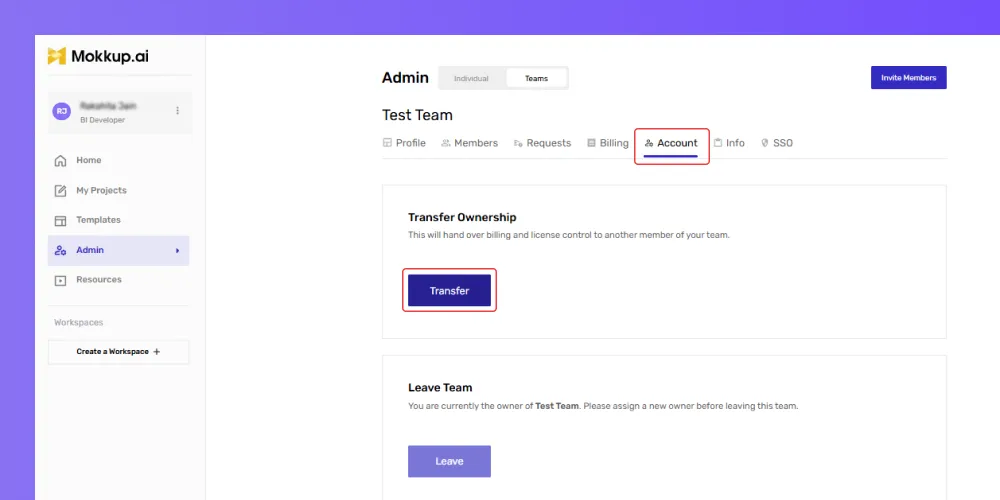
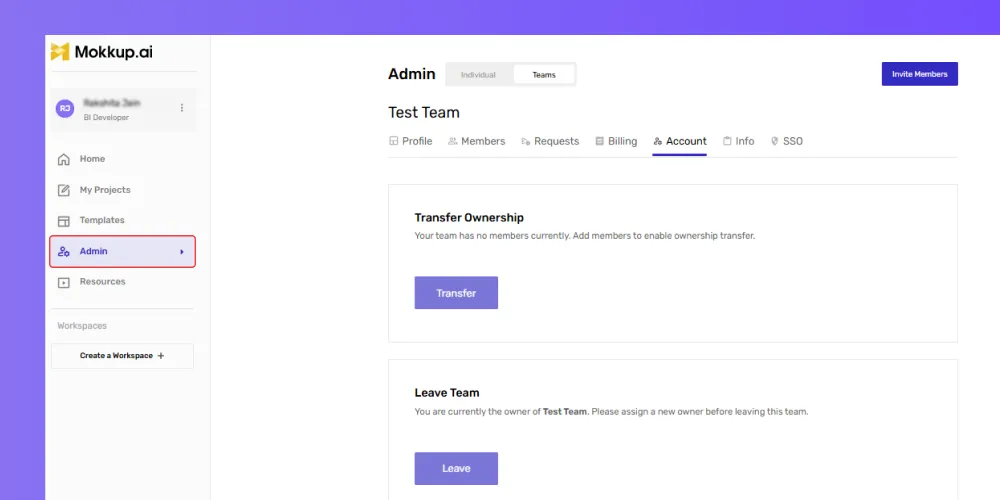
- Go to the Account section under your plan settings.
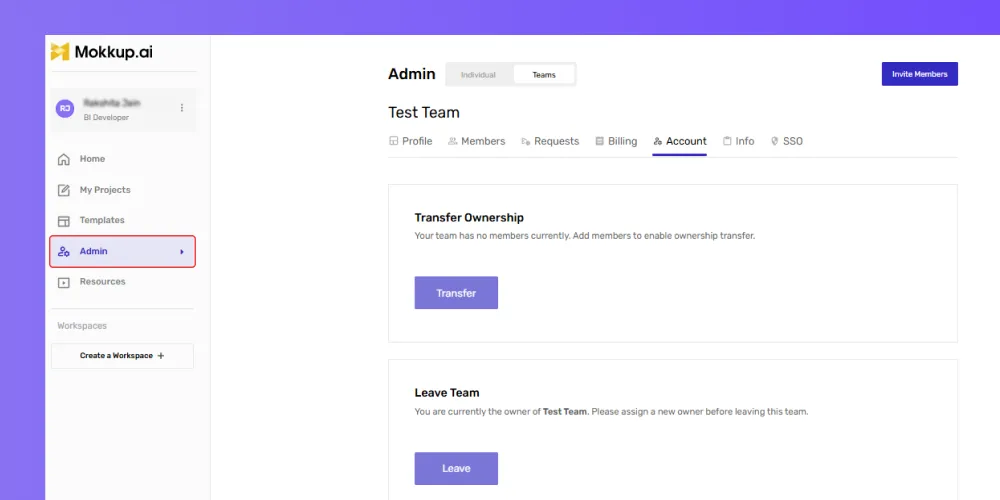
- Click the Transfer button.
- Ensure the member has already been added to the team, as ownership cannot be transferred to someone who is not part of the team
- Locate the member you want to assign as the new owner.
- Use the search bar to find the member if needed.
- Once located, select the member and click Confirm.
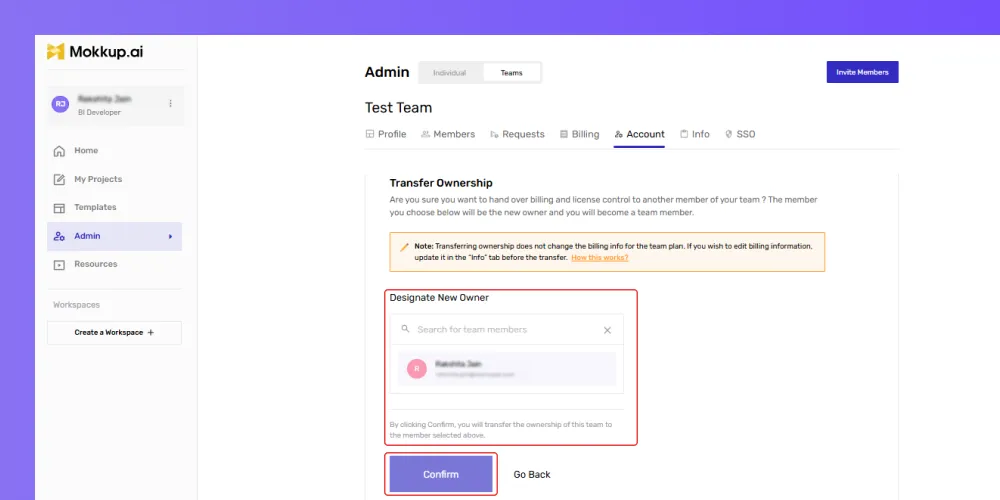
- Confirm the ownership transfer in the pop-up.
- After confirmation, the new owner will receive an email or in-app notification informing them of their upgraded role as team owner.
New Owner’s Access and Responsibilities
Once the transfer is complete, the new owner gains full administrative rights, allowing them to manage team billing, add or remove Pro licenses, assign licenses to team members, and oversee requests.
As the new owner, they should review billing details and manage licenses to ensure all team members who need access to Pro features have the necessary licenses.
Leaving the Team
For the Team Owner
- Transfer ownership to another member.
- Go to your account settings.
- Select the Leave Team option.
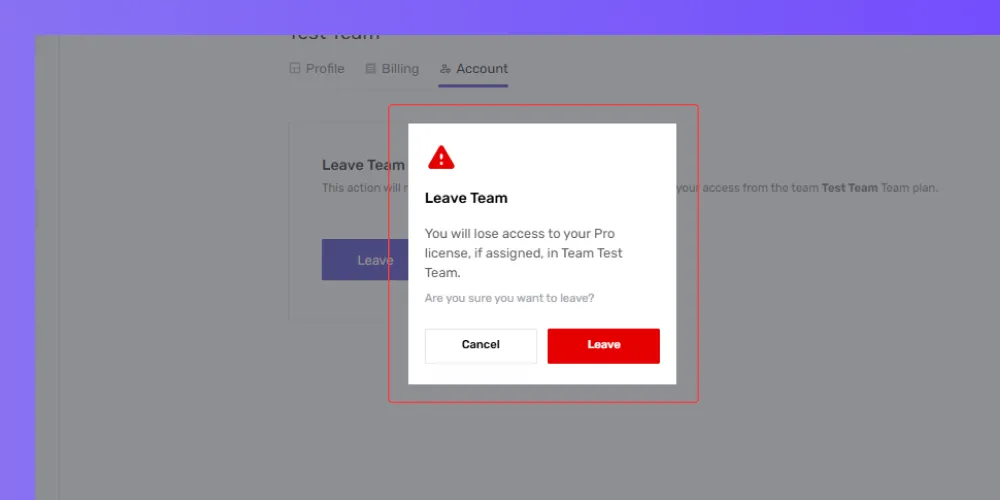
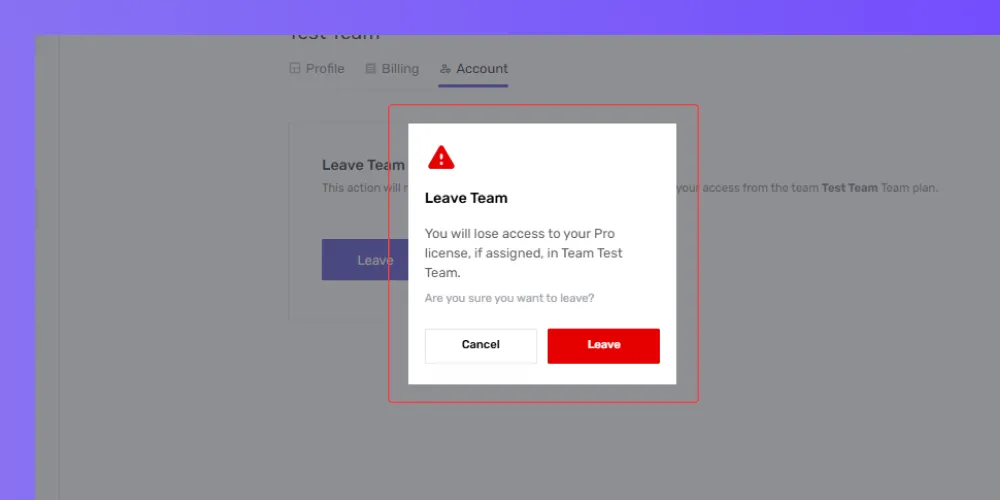
- Confirm the decision in the pop-up.
Please note, this step will remove their administrative privileges, restricting access to team settings, billing, and license management.
For Team Members
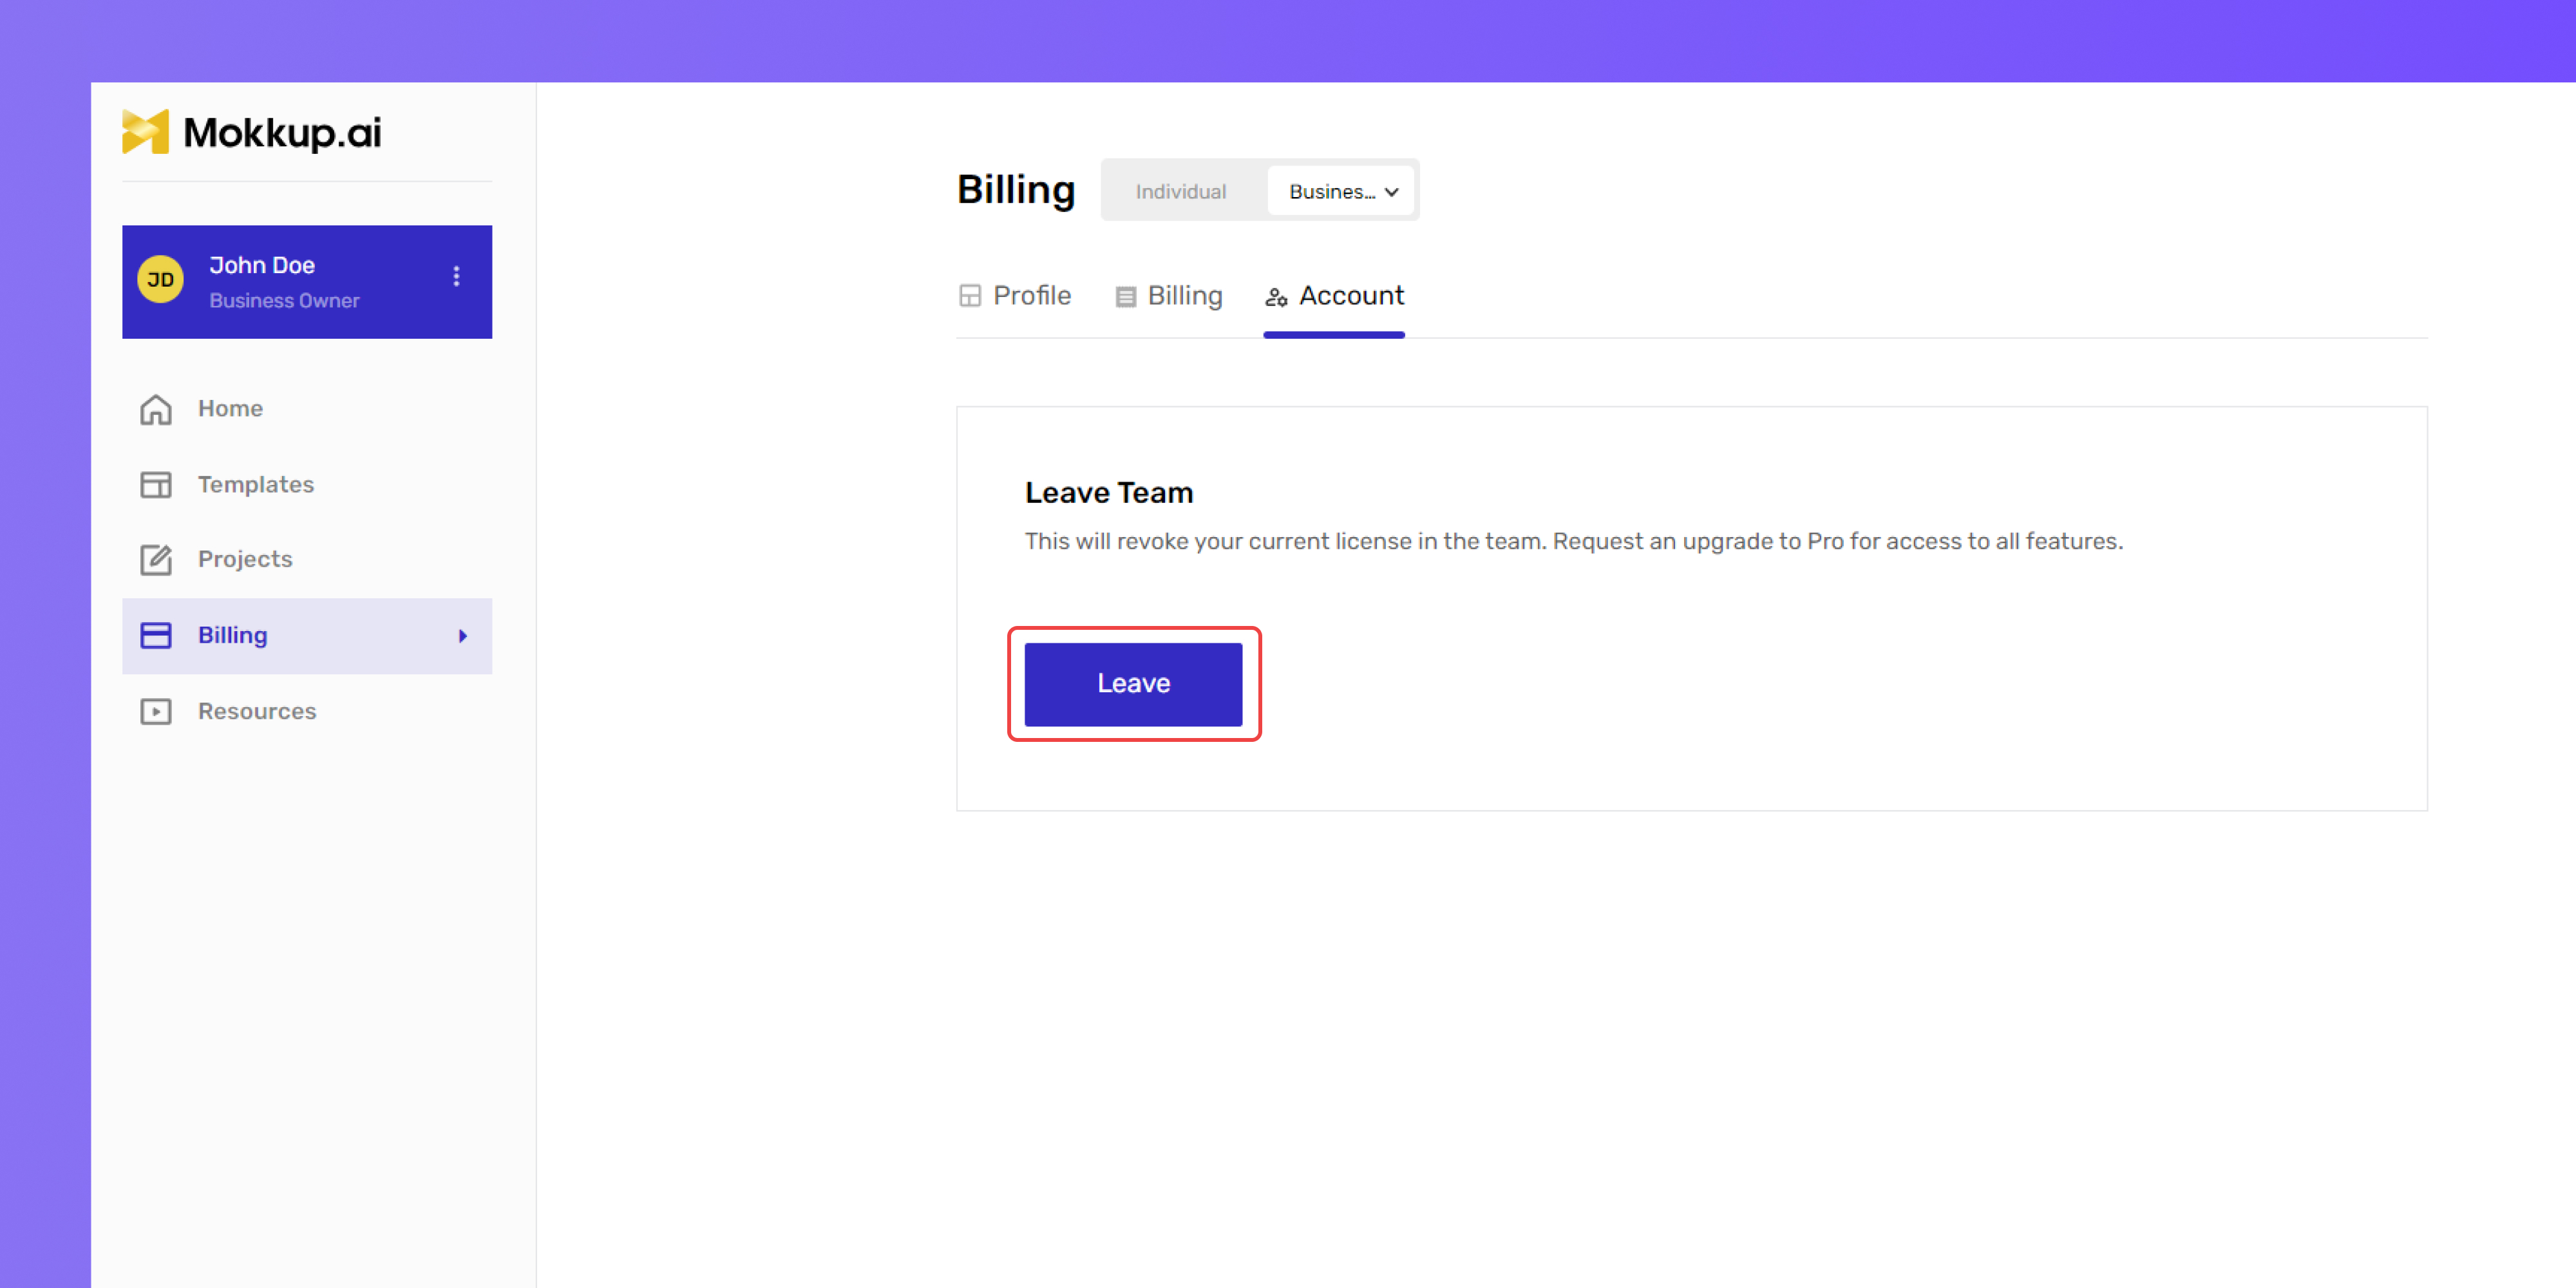
- Team members can leave by selecting the Leave Team option in their account settings.
- Once they leave, their license is automatically unassigned and available for reassignment.
- A confirmation pop-up appears to prevent accidental removal.
- Selecting Leave removes their access immediately.