

How to Configure Google SSO for Mokkup Enterprise
Adding and Configuring the App in Google Admin Console
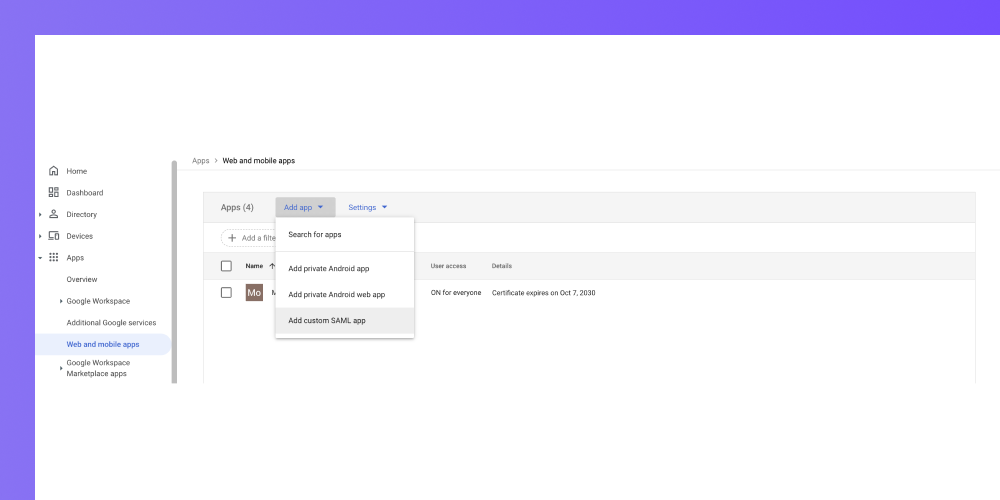
1. From your Google Workspace Admin Console, click Apps > Web and mobile apps
2. In the Apps panel click the Add app drop-down, and create new app
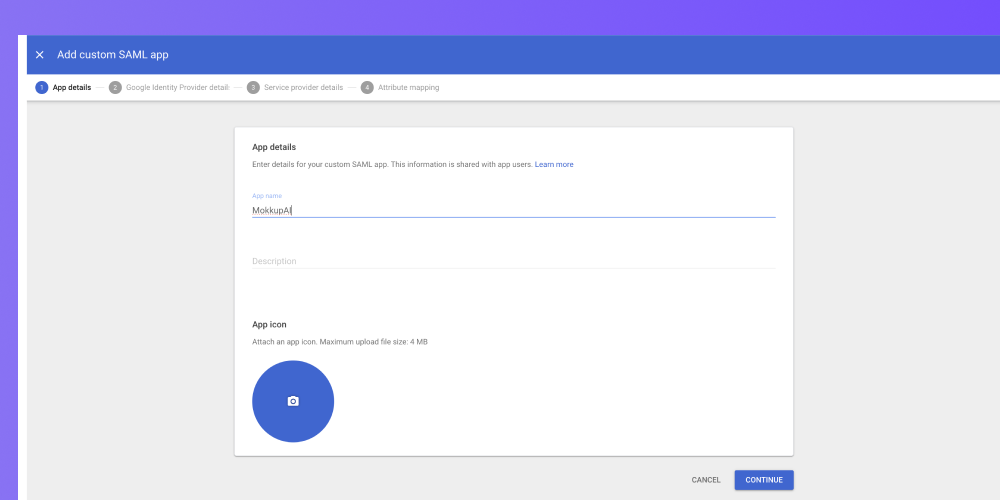
3. Give the App name in “App details” and click on continue.
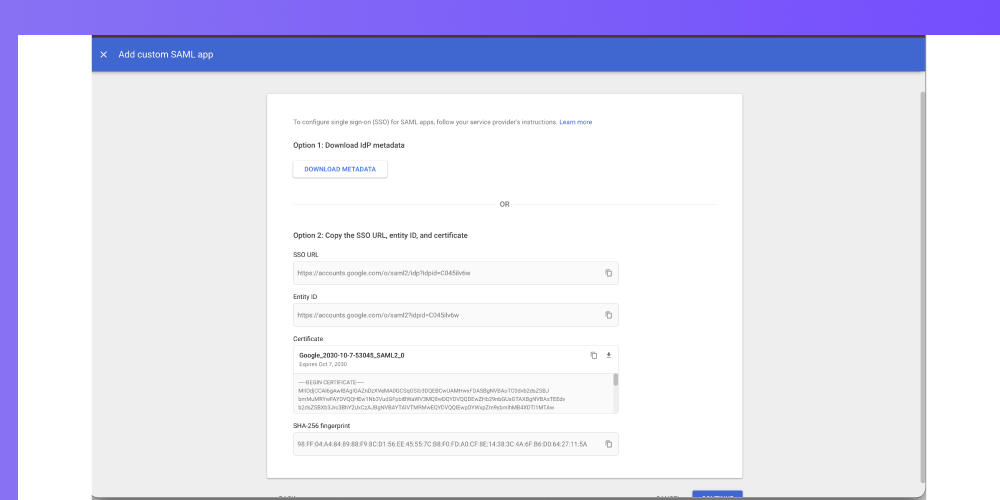
4. In the “Google Identity Provider details”, under Option 2 verify that “SSO URL”, “Entity ID”, and “Certificate” are all filled in, then click Continue. You will copy these values later when you configure Mokkup.
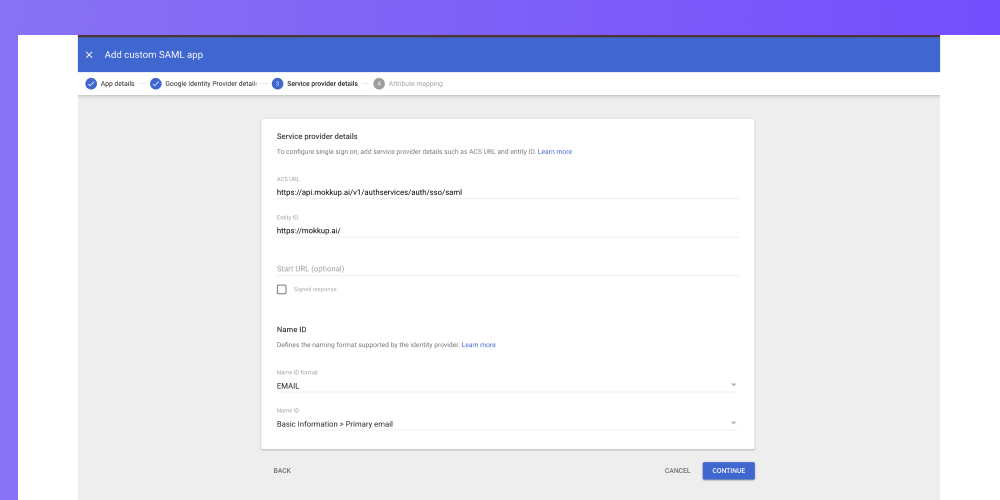
5. In the “Service provider details”, add the following values:
-
- Entity ID:- https://mokkup.ai/
- ACS URL:- https://api.mokkup.ai/v1/authservices/auth/sso/saml
- Start URL: blank
- Signed response: leave unchecked
- Name ID: EMAIL
6. Click Continue.
7. In “Attribute mapping” under “Google Directory attributes” choose First Name, then choose Last Name, making sure they map to the App attributes.
8. Click Finish. You will now see your app added to Google Workspace.
Configuring SSO in Mokkup Enterprise
- Open an Incognito tab in your browser and log into the Mokkup dashboard.
- Go to Admin > Enterprise > SSO.
- For the SAML Sign-in URL, return to your Google Workspace Admin Console and within the app, click DOWNLOAD METADATA. This panel gives you the option to copy the values needed
- Under SSO URL, click the Copy button. Go back to Mokkup and paste the value in SAML Sign-in URL
- Repeat this process for Key x.509 Certificate using the Certificate in Google
- In the Mokkup Admin > Enterprise > SSO page, on the Users from these domains will sign in using SSO section, ensure that you add at least one company domain.
- Click Test & Save Configuration.
Your SSO configuration is now complete.